As part of a project, we had a NodeJS serverless application that needed to be exposed to the internet. This application had only one functionality: receive a POST request and return a calculated JSON based on the input.
So we would receive a variable, and based on it, we would return a value.
Does it sound anything like f(x) = y?
For those of you that are software nerds, our situation might sound like a lambda function.
For those of you that are math nerds, our situation might sound like lambda calculus.
For those of you that work on IT operations, it will just sound like another headache. And for those familiar with Amazon Web Services, it certainly might sound like we could use AWS Lambda.
For Bezos, it probably sounds like fuel for his rockets.
In any case, we decided to use AWS and create a Lambda function to avoid provisioning or managing servers for this particular piece of code. You may still want to check what is AWS lambda, though.
Let’s see how to create a simple AWS Lambda function!
Get the code
In our case, we were storing the source code in Github. As it is a NodeJS application, the first thing is to download/pull the code to your local machine. In the project folder just run “npm install” so the node_modules is created, and then zip the contents of the project folder.
We will use that later.
Create a new Lambda function
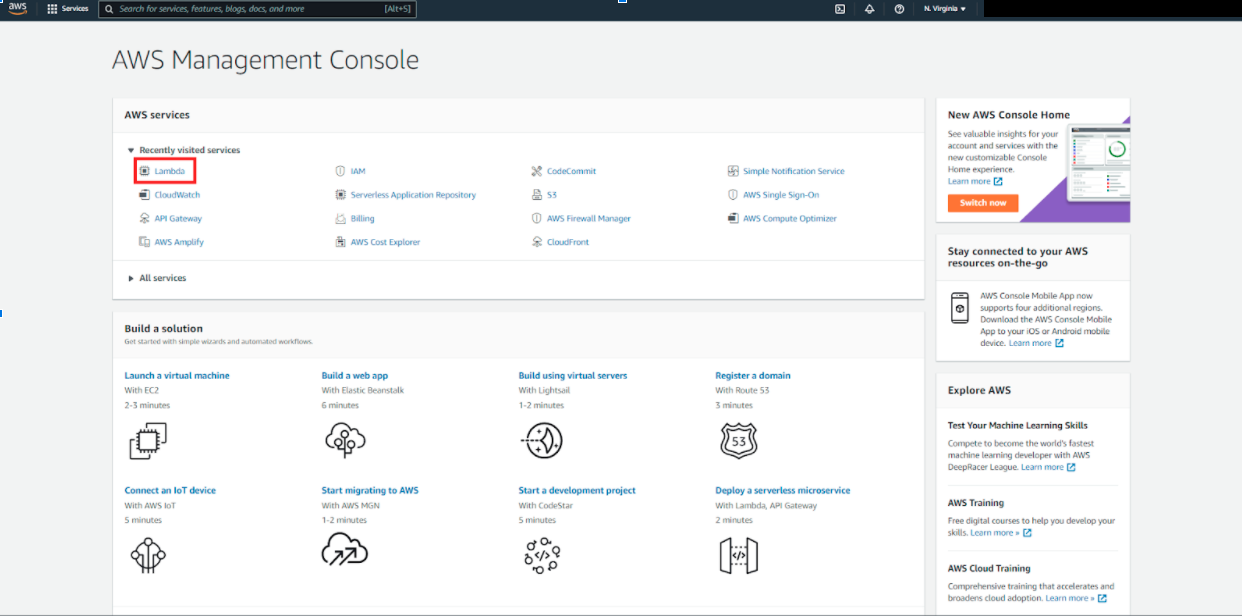
Sign in to AWS and open the Lambda functions from the AWS Management Console
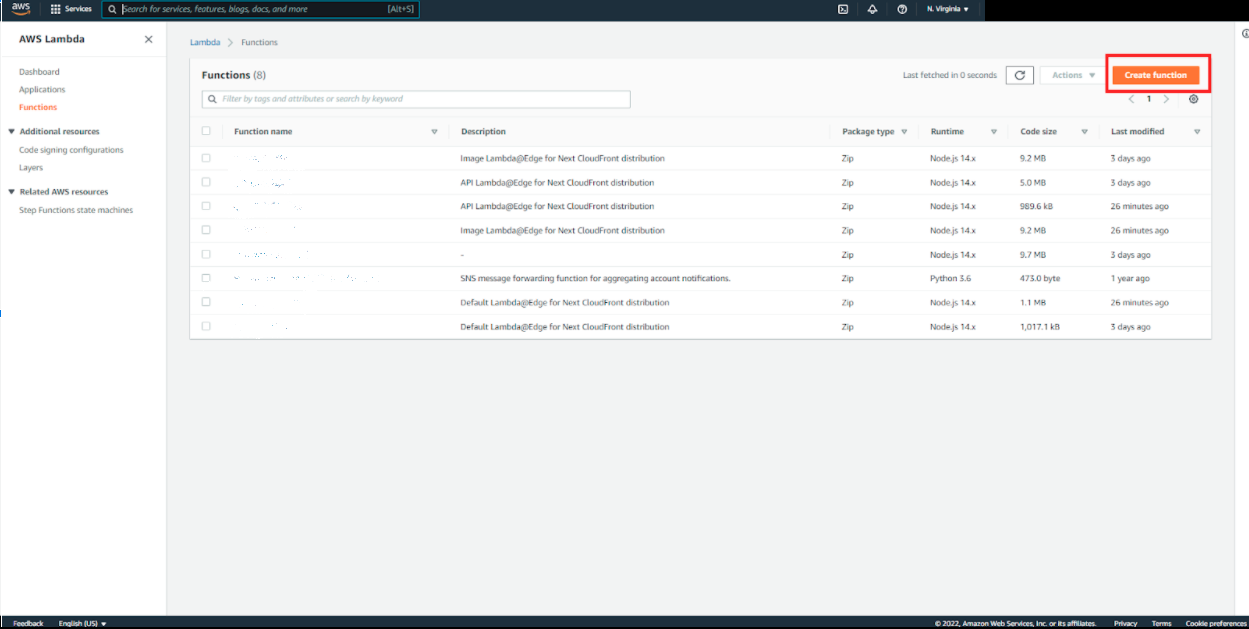
Create a new Lambda function:
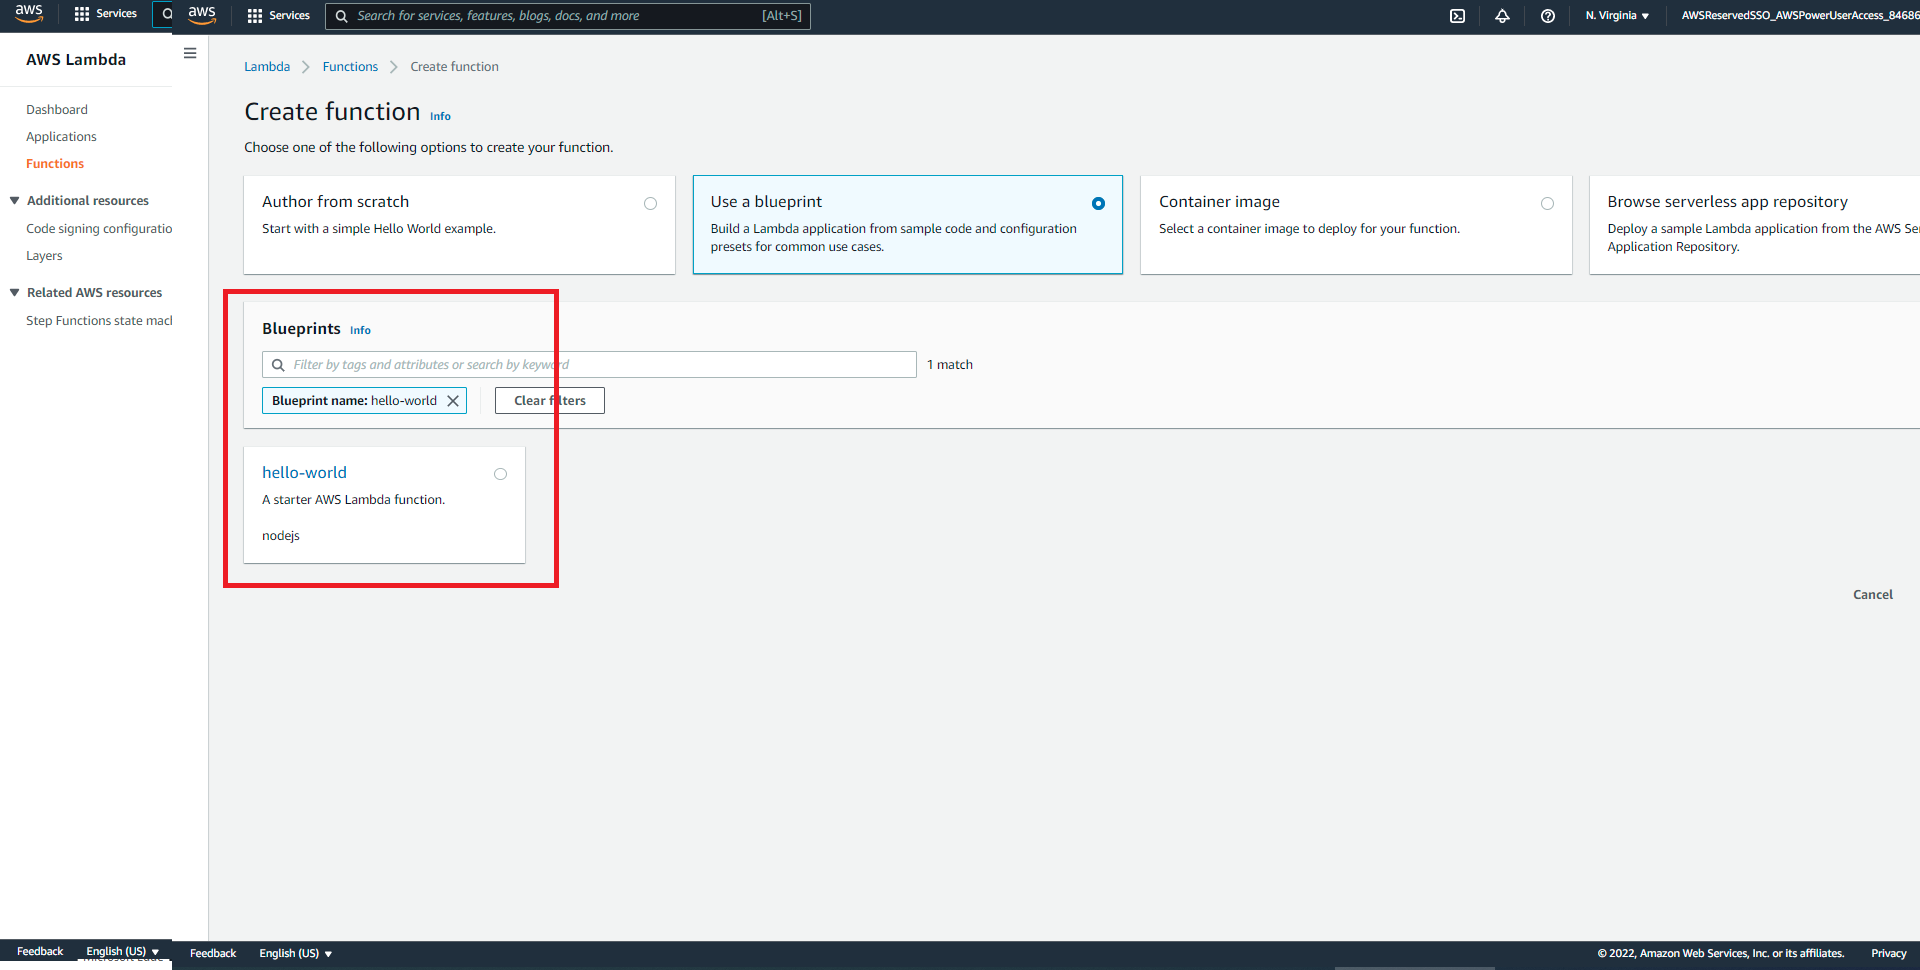
Let’s make it simple. Search for the Hello World blueprint
Pick a name and a role, or create a new one:
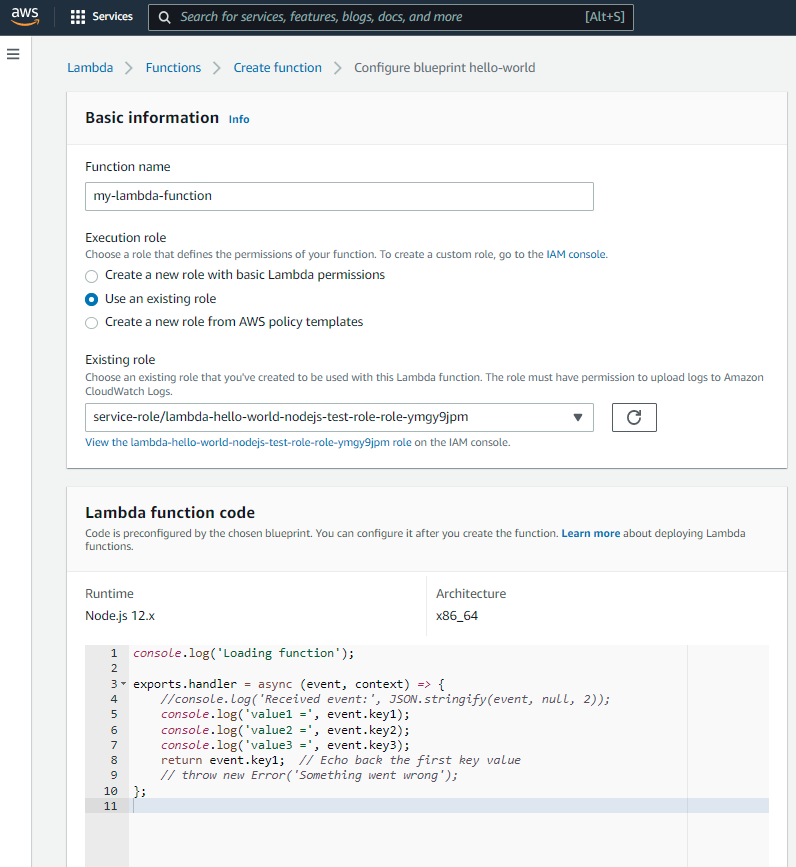
Upload the zip of the code created in the first section
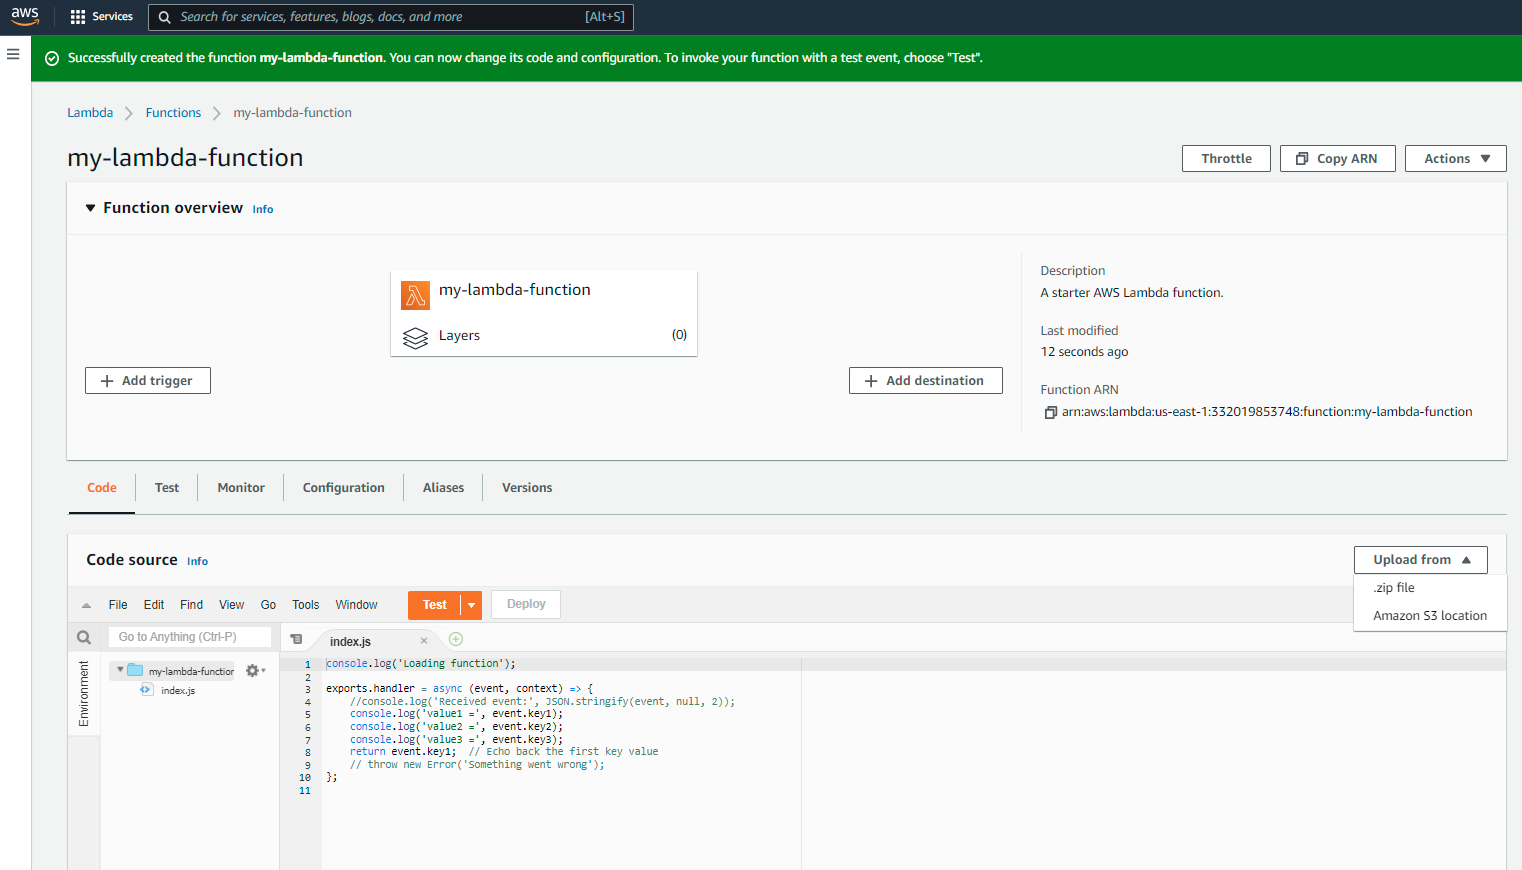


Test the Lambda function
Go to the Test section. Create a new test event, select api gateway event.
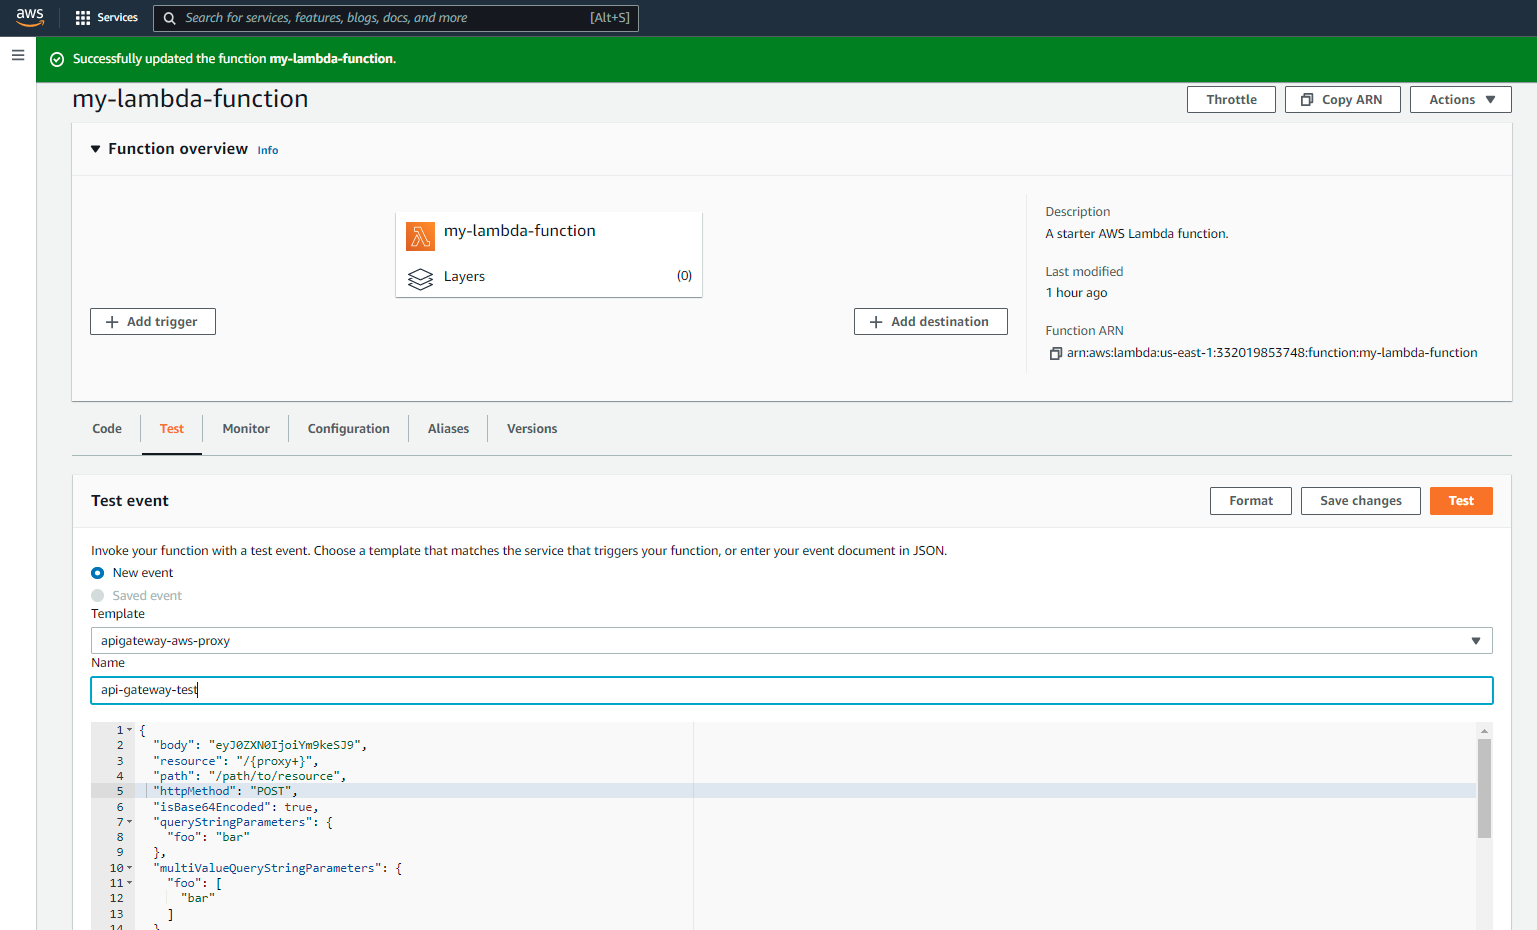
Make sure to update the value with some test content that fits your app!
{
  "body": "PROBABLY SOME JSON YOU WANT TO SEND!!!",
  "resource": "/{proxy+}",
  "path": "/ir",
  "httpMethod": "POST",
  "headers": {
    "Accept": "*/*",
    "Accept-Encoding": "gzip, deflate, sdch",
    "Accept-Language": "en-US,en;q=0.8",
    "Cache-Control": "max-age=0",
    "Content-Type": "application/json",
    "CloudFront-Forwarded-Proto": "https",
    "CloudFront-Is-Desktop-Viewer": "true",
    "CloudFront-Is-Mobile-Viewer": "false",
    "CloudFront-Is-SmartTV-Viewer": "false",
    "CloudFront-Is-Tablet-Viewer": "false",
    "CloudFront-Viewer-Country": "US",
    "Host": "1234567890.execute-api.us-east-1.amazonaws.com",
    "Upgrade-Insecure-Requests": "1",
    "User-Agent": "Custom User Agent String",
    "Via": "1.1 q1w2e3r4t5y6u7i8o9p0.cloudfront.net (CloudFront)",
    "X-Amz-Cf-Id": "cDehVQoZnx43VYQb9j2-nvCh-9z397Uhbp027Y2JvkCPNLmGJHqlaA==",
    "X-Forwarded-For": "127.0.0.1, 127.0.0.2",
    "X-Forwarded-Port": "443",
    "X-Forwarded-Proto": "https"
  }
}
You can save the test to use it multiple times too, so you make sure that your test works! You will probably want to receive a 200 with a JSON body (if your Lambda function is doing exactly that!).
Next, you want to call the function from somewhere else. There are several ways to achieve that, one is to use the AWS SDK (which could be a completely new blog post), and another is to just create an AWS API Gateway. We will explain how to do this too!
Create an API Gateway
- Sign in to the API Gateway console at https://console.aws.amazon.com/apigateway.
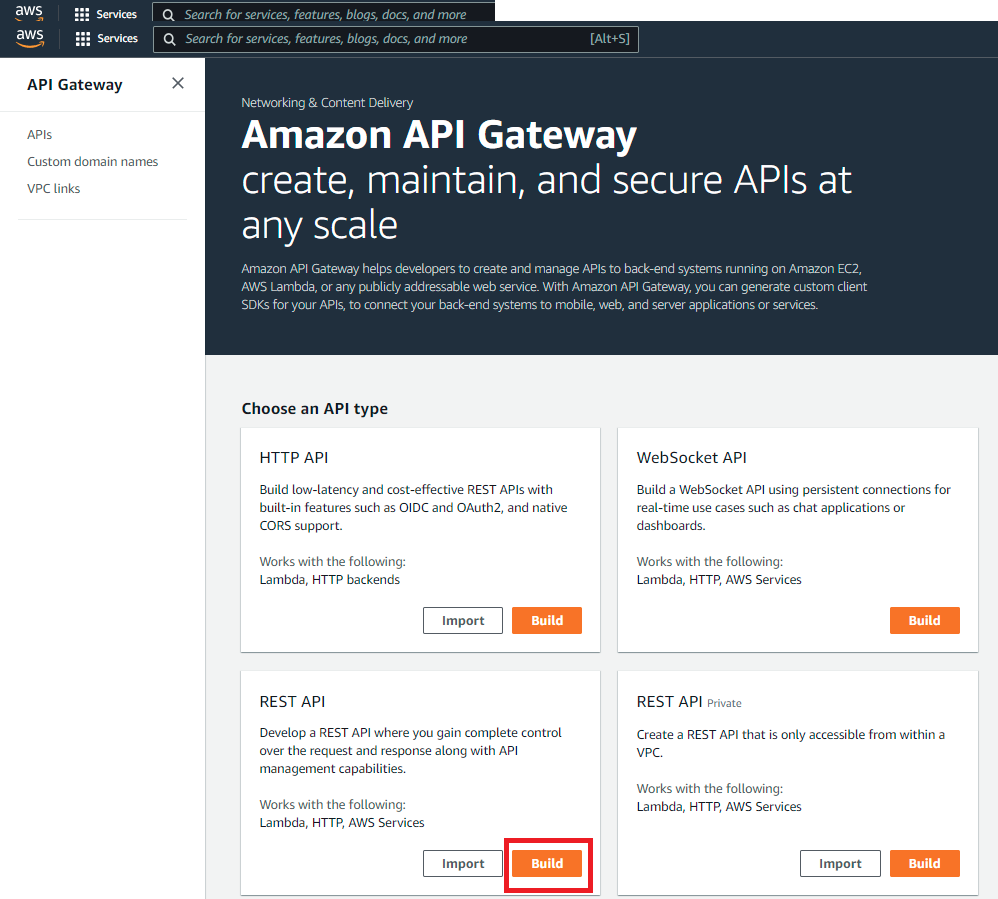
- If this is your first time using API Gateway, you see a page that introduces you to the features of the service. Under REST API, choose Build.
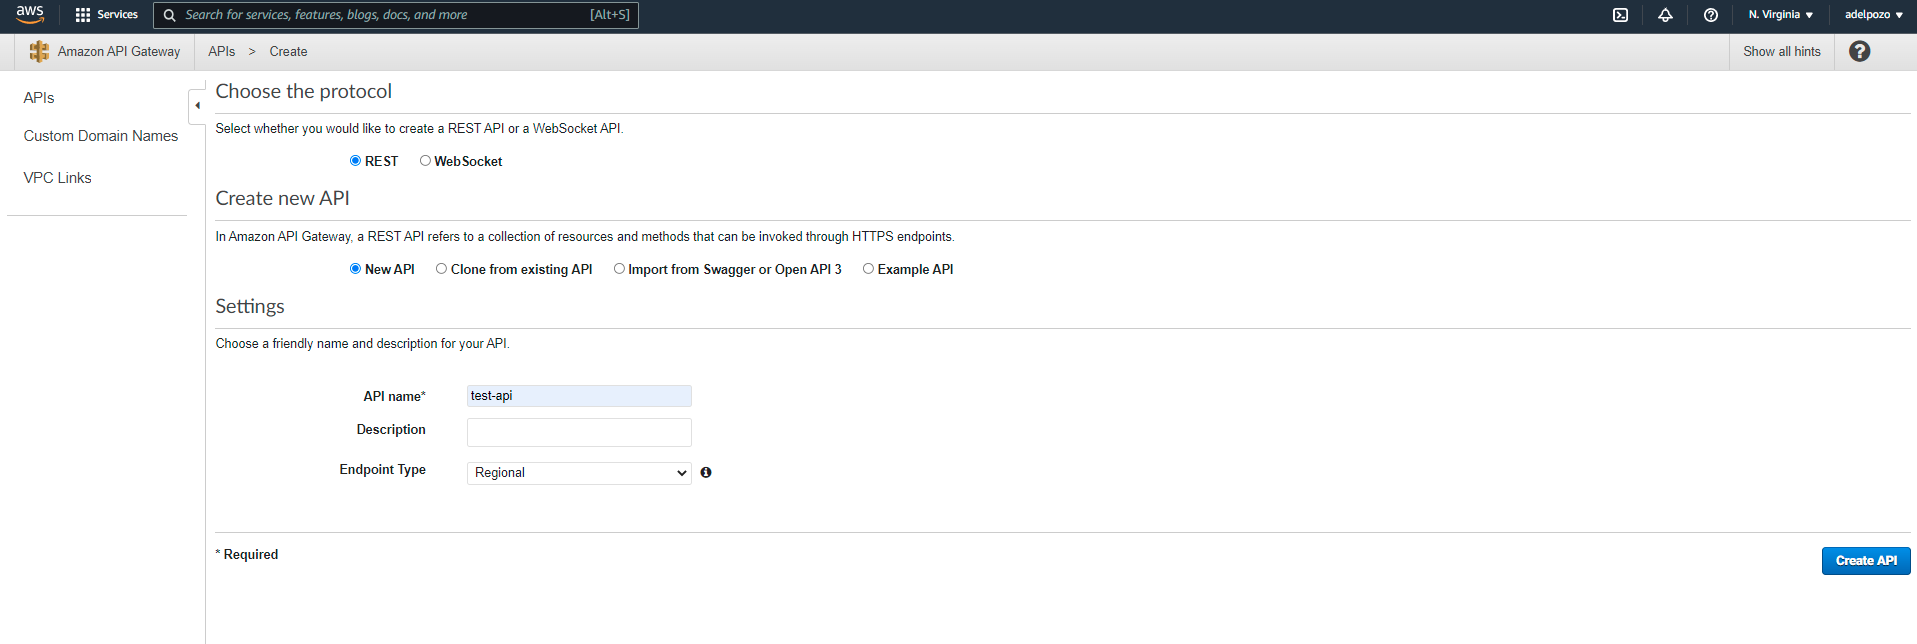
- Create an empty API as follows:
- Under Create new API, choose New API.
- Under Settings:
- For API name, enter test-api.
- If desired, enter a description in the Description field; otherwise, leave it empty.
- Leave Endpoint Type set to Regional.
- Choose Create API.
4. Create a test resource as follows:
- Choose the root resource (/) in the Resources tree.
- Choose Create Resource from the Actions dropdown menu.
- Leave Configure as proxy resource unchecked.
- For Resource Name, enter endpoint.
- Leave Resource Path set to /endpoint. In our case, it was crucial that this matched the expected endpoint name of the NodeJS POST endpoint!
- Leave Enable API Gateway CORS unchecked.
- Choose Create Resource.

5. In a proxy integration, the entire request is sent to the backend Lambda function as-is, via a catch-all ANY method that represents any HTTP method. The actual HTTP method is specified by the client at run time. The ANY method allows you to use a single API method setup for all of the supported HTTP methods: DELETE, GET, HEAD, OPTIONS, PATCH, POST, and PUT.
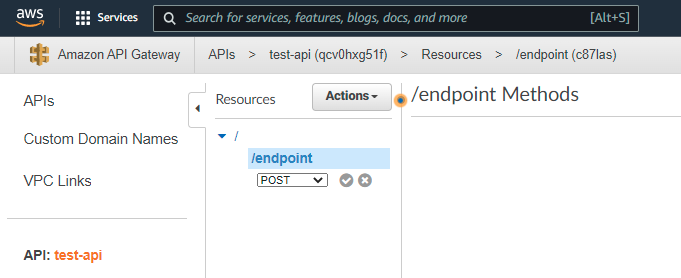
As our Lambda application only managed POST requests, we would only care about it. To set up the POST method, do the following:- In the Resources list, choose /endpoint.
- In the Actions menu, choose Create method.
- Choose POST from the dropdown menu, and choose the checkmark icon
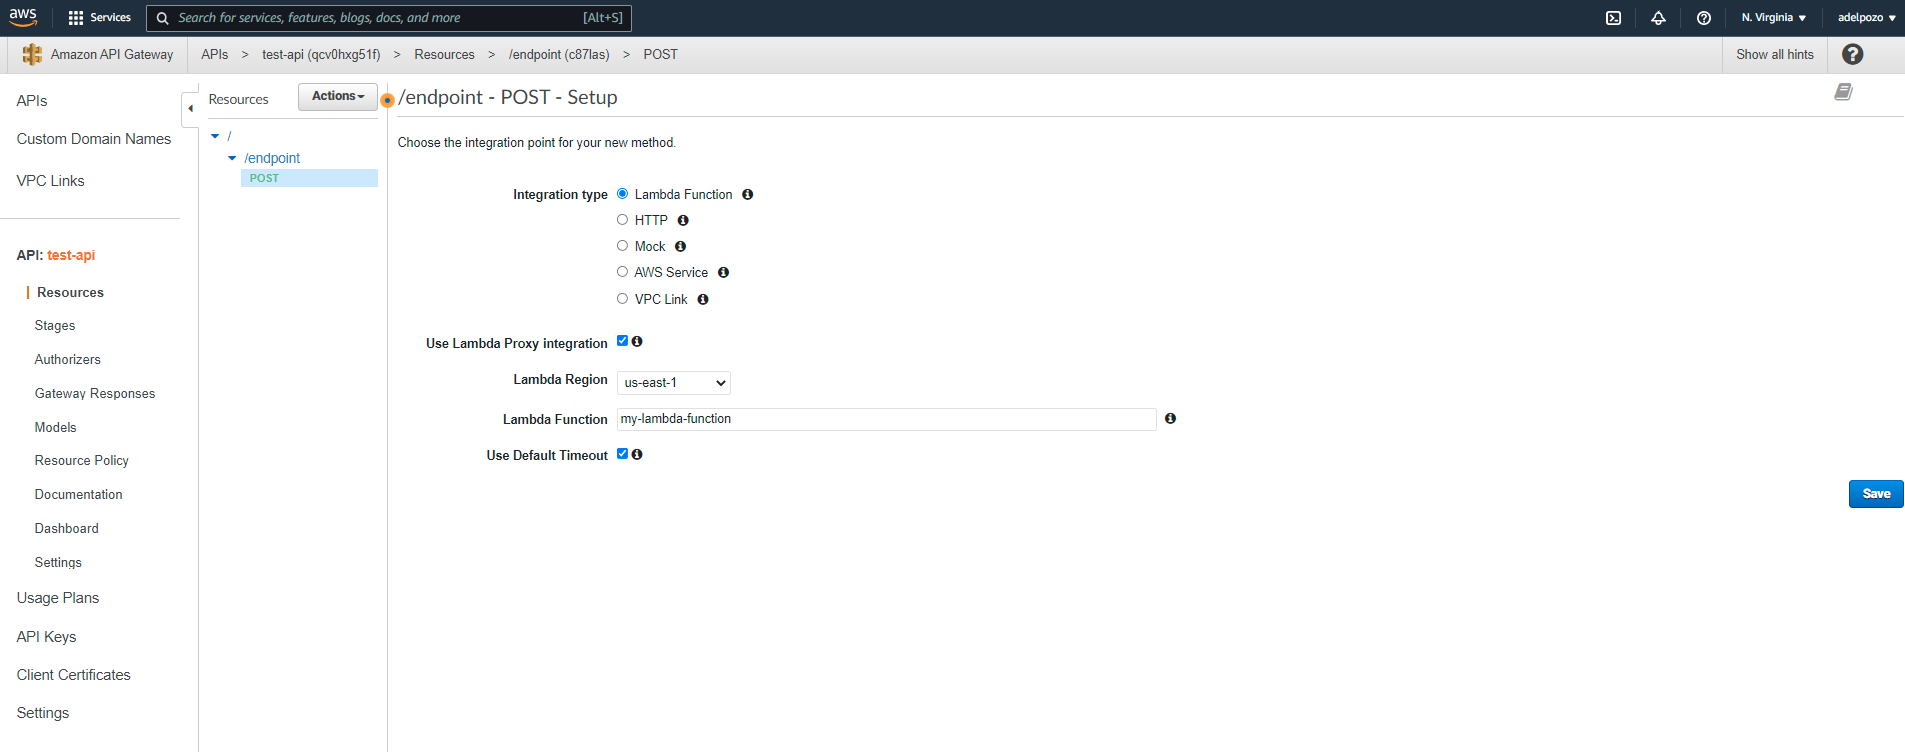
- Leave the Integration type set to Lambda Function.
- Choose Use Lambda Proxy integration.
- From the Lambda Region dropdown menu, choose the region where you created the my-lambda-function Lambda function.
- In the Lambda Function field, type any character and choose my-lambda-function from the dropdown menu.
- Leave Use Default Timeout checked.
- Choose Save.
- Choose OK when prompted with Add Permission to Lambda Function.

Deploy the API
Deploy the API in the API Gateway console
- Choose Deploy API from the Actions dropdown menu.
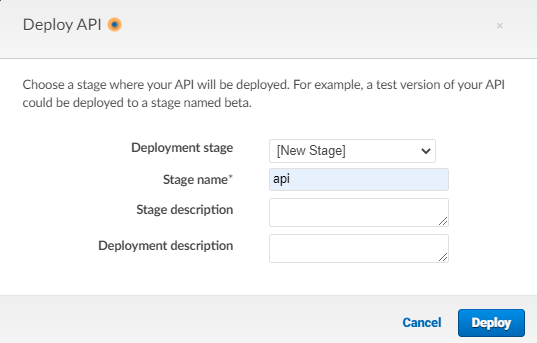
- For Deployment stage, choose [new stage].
- For Stage name, enter api.
- If desired, enter a Stage description.
- If desired, enter a Deployment description.
- Choose Deploy.
- Note the API’s Invoke URL.
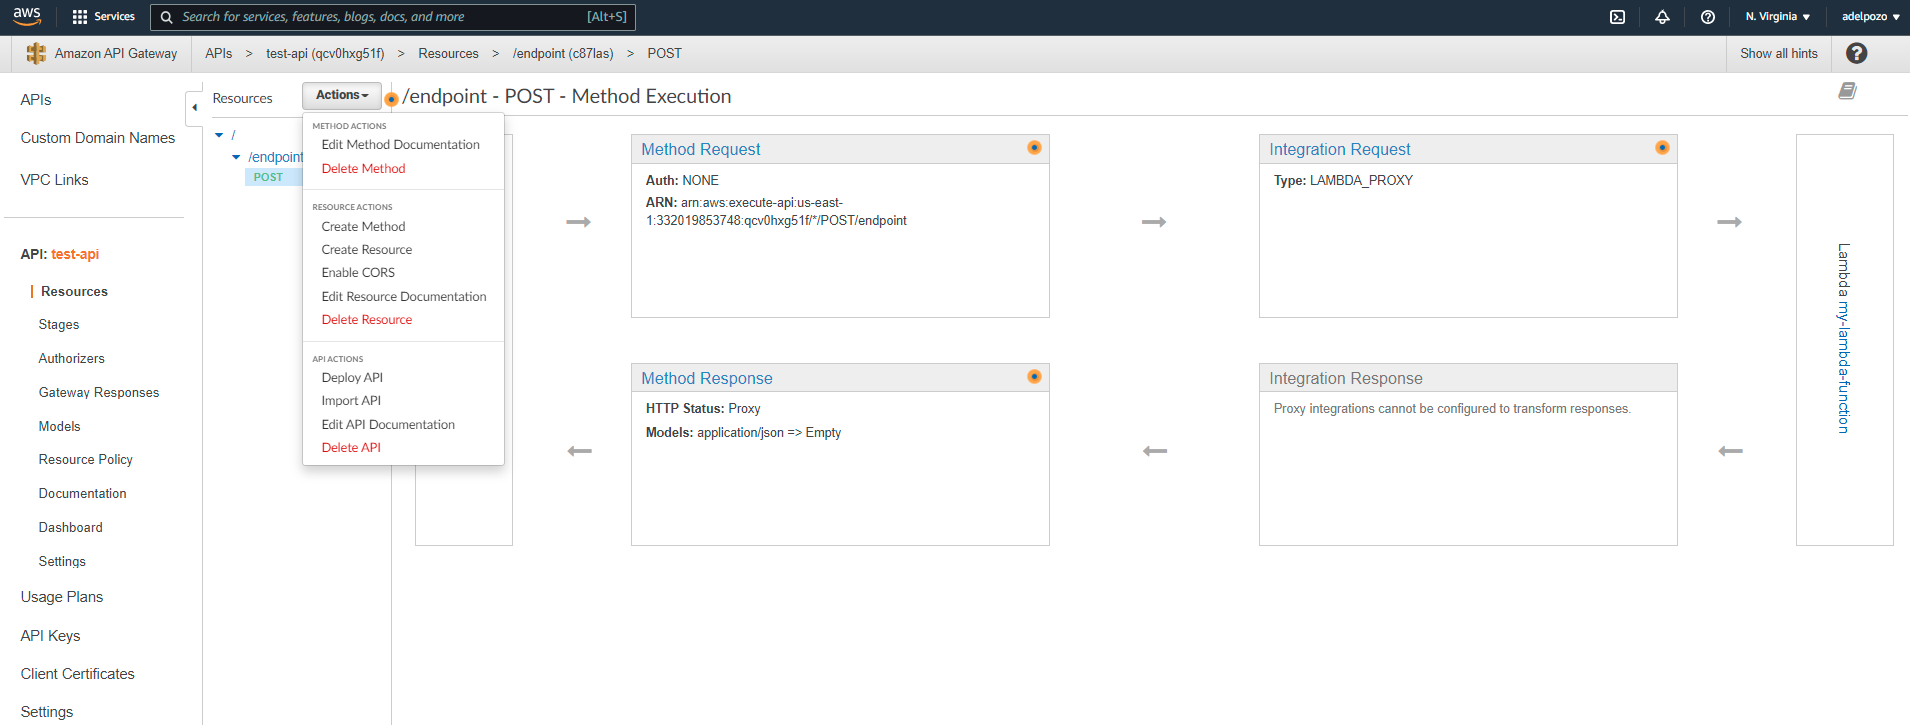

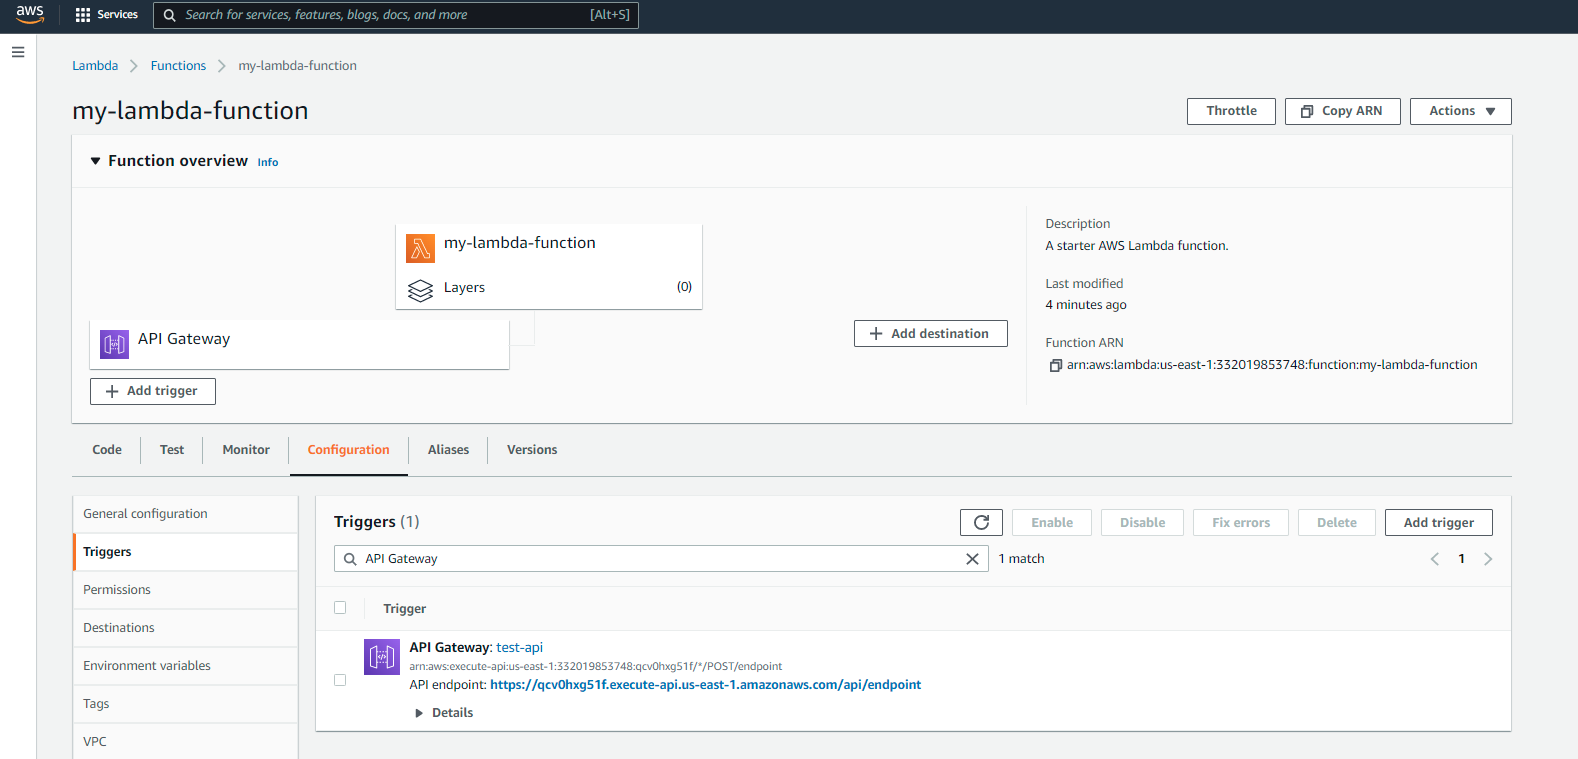
In this case, the stage URL is https://qcv0hxg51f.execute-api.us-east-1.amazonaws.com/api, which means the POST resource url will be https://qcv0hxg51f.execute-api.us-east-1.amazonaws.com/api/endpoint.
Also, if you access the Lambda function, you will see the API Gateway created there:
Test the API
First, test that the Resource we have created actually calls the Lambda function correctly. For that, click on the POST resource > Test section
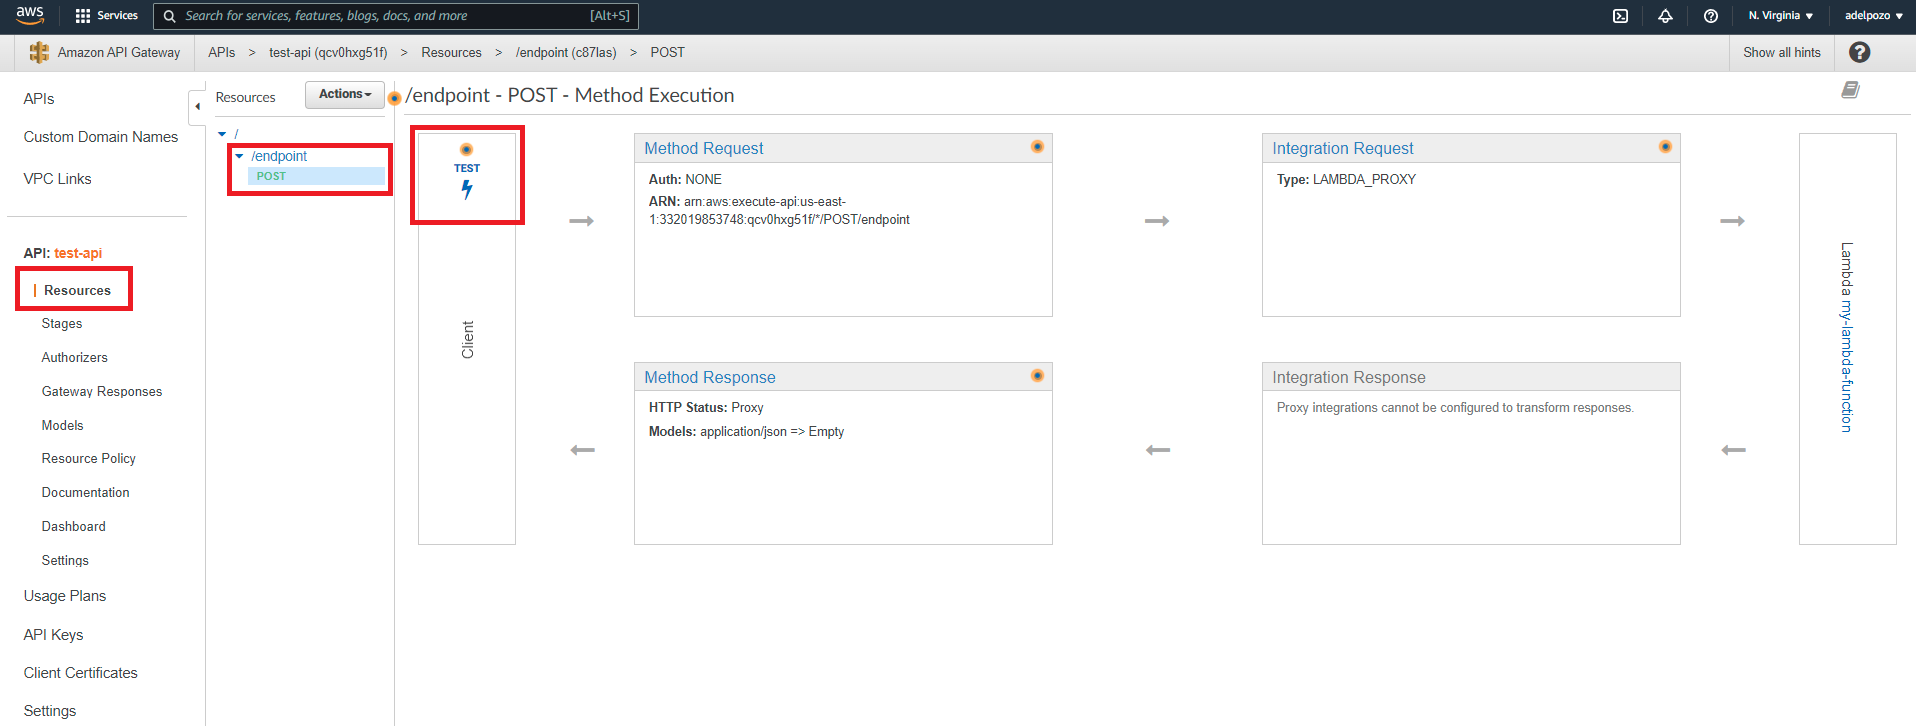
In our case we had to make sure we were adding the content-type application/json header, and the body with the test content for your app!
Next, you should be able to do the same with Postman or any other method of your choice. Just make sure to do the correct request to the endpoint you created (in this case, https://qcv0hxg51f.execute-api.us-east-1.amazonaws.com/api/endpoint), using the correct headers and body values!
Extra: CORS issues
It has been noticed that calls from an application deployed in Amplify calling the API gateway could throw a CORS error. To avoid this, in our case we had to Enable CORS on the Resource.
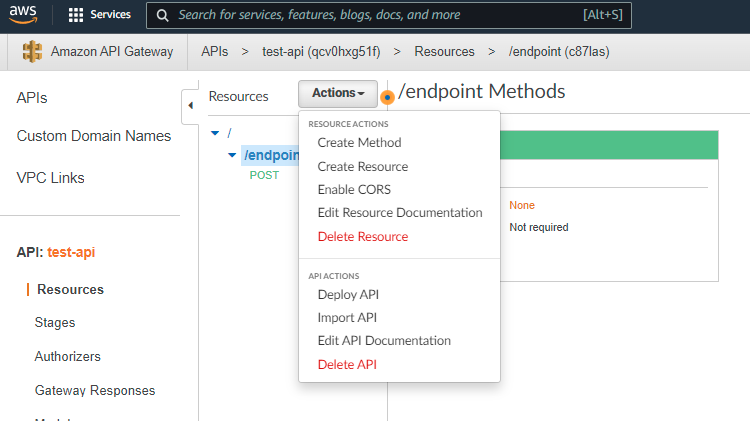
Then, enable the Gateway Responses for test-api API options, the POST and OPTIONS methods, add the desired values to the headers, and click on Enable CORS and replace existing CORS headers.

Finally, deploy the API and test.

The added headers should be present and the CORS issue should be gone from the application.
Unless you also need to enable it in your NodeJS app! If this is your case, a piece of code like this might help:
app.use(function(req, res, next) {
    res.header('Access-Control-Allow-Origin', '*');
    res.header('Access-Control-Allow-Methods', 'POST, OPTIONS');
    res.header('Access-Control-Allow-Headers', 'Content-Type, Authorization, Content-Length, X-Requested-With');
    if ('OPTIONS' === req.method) {
      res.send(200);
    }
    else {
      next();
    }
});
Solving CORS issues in a Express NodeJS app
Hope it helps!
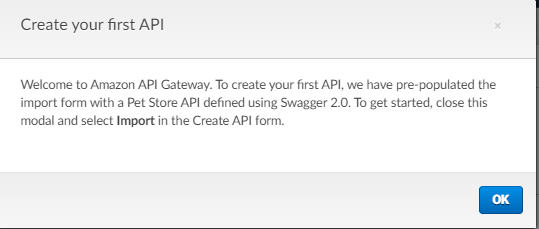
When the Create Example API popup appears, choose OK.
If this is not your first time using API Gateway, choose Create API. Under REST API, choose Build.

