CICD (Continuous Integration and Continuous Delivery): CICD is a set of automated processes to continuously integrate the code developed by the development team, run automated regression tests, and deploy them to the target environments. The extent of automation and the target environments covered by this process determines the DevOps maturity levels of an organization. Organizations can start small and then take the automation to a level where the developed code goes through various stages including code integration, automated testing, and then production deployment.
Jenkins: Jenkins is one of the widely used CICD tools. It supports code integration and delivery from and to multiple platforms. Multiple features are available through its plugins and can be integrated with multiple tools as part of the CICD pipeline setup and automation.
Maven: Maven is one of the popular build tools. It uses POM (Project Object Model) for the build process. All the build and deployment activities can be configured (lifecycle) using this XML. Jenkins has a plugin for Maven.
Pipeline: Pipeline is nothing but stitching all the pieces of the CICD activities into one single executable unit (with the sequence of steps, conditional execution of steps, notifications, etc.) and configuring the triggers to execute the pipeline itself. A brief overview of the pipeline build process is covered at the end of this article.
Configuring Jenkins for CICD
1. Jenkins Installation on Linux
$ yum install wget

$ wget --header "Cookie: oraclelicense=accept-securebackup-cookie" http://download.oracle.com/otn-pub/java/jdk/8u161-b12/2f38c3b165be4555a1fa6e98c45e0808/jdk-8u161-linux-x64.rpm

$ sudo yum localinstall jdk-8u161-linux-x64.rpm

$ sudo yum update

$ sudo wget -O /etc/yum.repos.d/jenkins.repo http://pkg.jenkins-ci.org/redhat-stable/jenkins.repo

$ sudo rpm --import http://pkg.jenkins-ci.org/redhat-stable/jenkins-ci.org.key

$ sudo yum install jenkins

$ sudo service jenkins start

$cat /var/lib/jenkins/secrets/initialAdminPassword
2. Jenkins Installation on Windows (Jenkins v 2.153)
-
- Download Windows version of Jenkins from https://jenkins.io/download/
- Run the downloaded Jenkins.msi
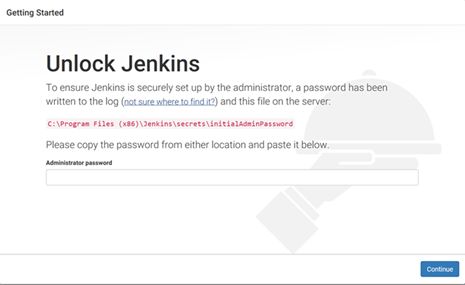
- We will be asked to copy-paste the admin password from C:\Program Files (x86)\Jenkins\secrets\initialAdminPassword (auto-generated by Jenkins installation) and click Continue button
-
- At this point, we can optionally install suggested plugins.
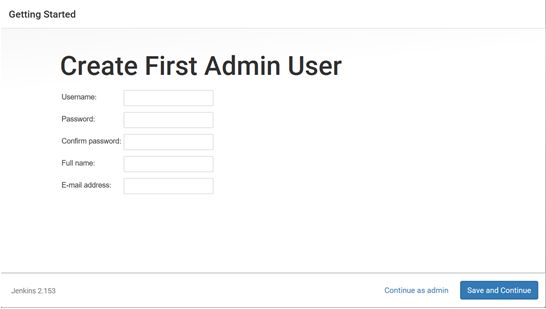
- Once the plugins are installed, we will be prompted to create a user or continue as admin.
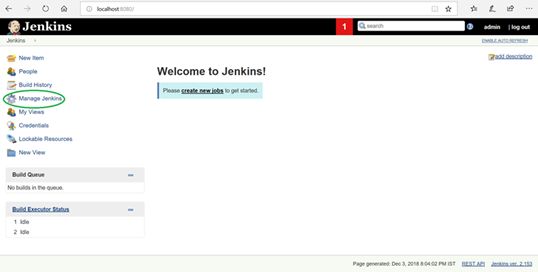
- We will be presented with Jenkins home screen (dashboard) at this stage.
3. Install Required Plugins
- Go to Jenkins dashboard
- Select Manage Jenkins à Manage Plugins
- Select the required updates and plugins from Updates and Available tabs
- Install without restart
4. Install Git on Jenkins Server
-
- On the Jenkins dashboard
- Select Manage Jenkins à Manage Plugins
-
- Check from the Installed tab whether GitHub Plugin and Git Plugin are already installed (at the time of Jenkins installation).
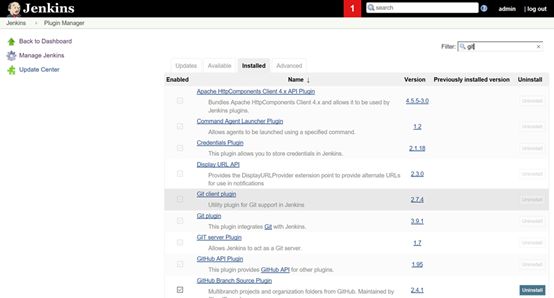
- If these plugins are not found on the Installed tab, then we can search and install these from the Available tab.
5. Configure JAVA_HOME and MAVEN_HOME
-
- Go to the Jenkins dashboard
-
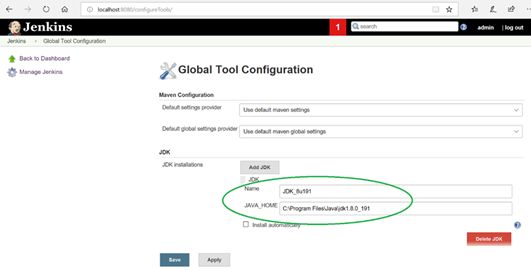
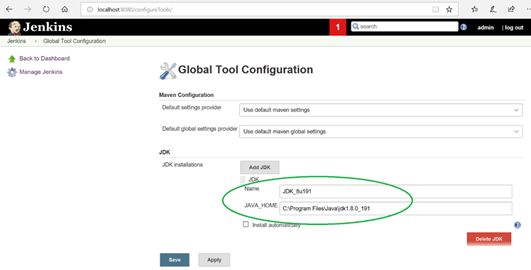
- Select Manage Jenkins à Global Tool Configuration
- Set JAVA_HOME
-
- Set MAVEN_HOME
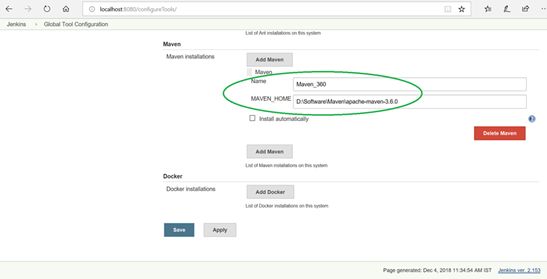
- Click Apply button
6. Integrate Jenkins with GitHub Repository
-
- Go to the Jenkins dashboard
- Click on the specific project link (in this example it is “MyTestJavaProject”)
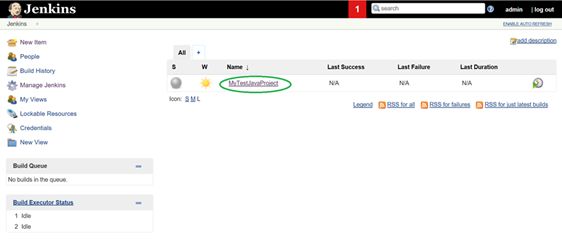
-
- Select Configuration from the left menu
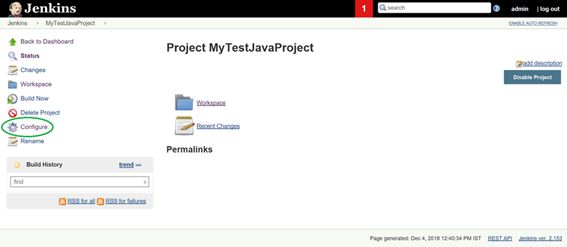
-
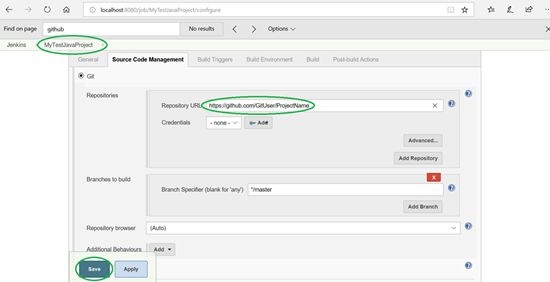
- Go to the Source Code Management tab and input the GitHub repository URL
- Provide the credentials (for a private repository) and click Save
7. Steps to automate the deployment using shell script
- Here is just an example of what a deployment script can be. Can be modified to specific needs.
- Connect to the server and execute the deployment script
ssh -i /.ssh/id_dsa [email protected]

cd <TOMCAT_DIR>
- First, copy the current war to a backup directory
cp -rf tomcat/webapps/testapplication* /backup/testapplication/
- Execute a script (stored on the server) to properly stop the app
sh bin/tomcat.sh stop
- Delete current app (file name testapplication)
rm -rf /tomcat/Webapps/testapplication

rm -rf /tomcat/Webapps/testapplication.war
- Copy the uploaded war in tomcat app directory
cp /tmp/modifiedtestapplication.war /tomcat/Webapps/testapplication.war
- Execute a script (stored on the server) to start the testapplication
sh /bin/testapplication.sh start
8. Steps to create and build pipeline
-
- Go to the Jenkins dashboard
- Click on the New Item from left menu
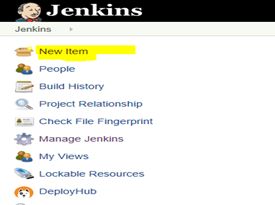
-
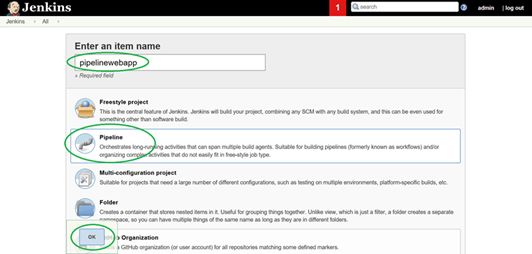
- Enter a name for pipeline and select Pipeline from the options. Click OK to proceed to the next step.
-
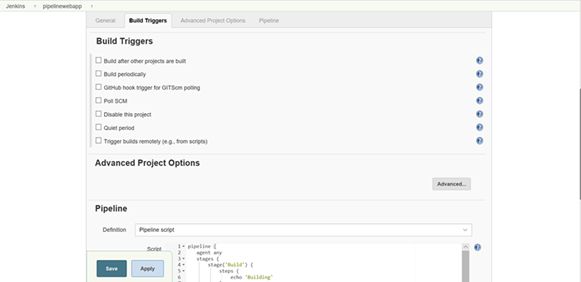
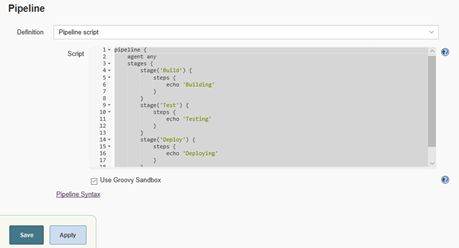
- We can now start working on the Pipeline script. The text box in the middle is where we can write the script. See the sample Pipeline script in the text box.
-
- Click Save button, which will take us to the item’s detail page (in this case, “pipelinewebapp”).
- Select Build Now from the left menu which will validate and build the pipeline.
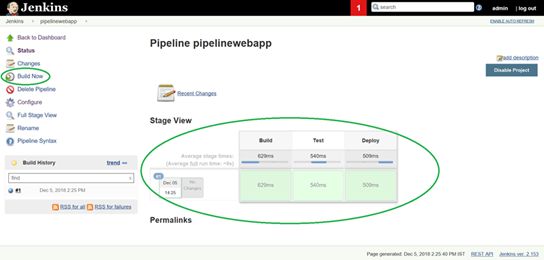
- Status of the pipeline build is displayed in the form of a table.
9. Pipeline Execution
-
- We can configure this pipeline to be executed based on an event, schedule, or other options. When the trigger condition satisfied, all the steps in the pipeline will run as they are configured.
