Wouldn’t it be great to ask Alexa for your electricity bill, and it will tell you your bill amount, due date and other relevant stuff without having to visit the electricity provider’s website or opening their mobile app. For that to happen, Alexa needs to know the user’s account in the electricity provider’s website and should be able to fetch user-specific data from the electricity provider’s website. In other words, you need to link your electricity provider user account with your Alexa account. In this article, we will learn how we can achieve that – get the user’s context into your custom Alexa skill.
This article is intended to showcase Account linking between your website hosted on Liferay Platform and the Amazon Alexa custom skill you have developed.
Prerequisites for the article:
1) Basic understanding of creating skills on Alexa
2) Experience with Liferay Development
3) Understanding of OAuth to authenticate and authorize users.
In case you need to get started with Alexa skill development you can check documentation on Amazon’s Developer Website. If you need to learn more about OAuth you can check out the OAuth Bible; they have some good documentation about how OAuth works and the differences between OAuth 1.0 and OAuth 2.0. For insights into Liferay development, you can review the Liferay Developer site and also our blogs at XTIVIA’s site.
As we discussed before, Account Linking is required if your custom skill needs personalized data from Liferay. Account Linking in Alexa uses OAuth 2.0, to achieve authenticated access to other systems’ assets without actually sharing the login credentials. In our case, Alexa is the Client requesting access to the assets hosted on the Resource Server (Liferay) via Authorization Server (again Liferay), and access will be granted by the Resource Owner (User on Liferay).
1. OAuth 2.0 Account Linking Flow
The below diagram gives a quick overview of the flow during Account Linking in OAuth 2.0 systems.

Fig 1.0: Account Linking Flow in OAuth 2.0
Let’s jump into the steps required to achieve our intended flow.
2. Setting Up Liferay DXP 7.0
Liferay will act as our OAuth Provider in this flow. But Liferay DXP 7.0 doesn’t provide any support for this out of the box. For this, we need to download Liferay Connector to OAuth 1.0a app from the marketplace. This app provides the OAuth Administration screens required for creating the OAuth app, the screens for authorizing access to the third party and also updates the service access policies which enable us to call Liferay OOTB JSON services (services listed in /api/jsonws).
Once you have downloaded the OAuth marketplace app, put the lpkg file in your Liferay instance deploy folder. You will need to restart the server in order to access the OAuth Admin portlet in the control panel. So, once you have restarted the server, log in as the Portal Admin and open the OAuth Admin Screen.

Fig 2.1: OAuth Admin Screen
Since you are accessing the OAuth admin for the first time it is empty. Click on the Add button on the top. Once you click on the Add button, the OAuth app Create screen opens up.
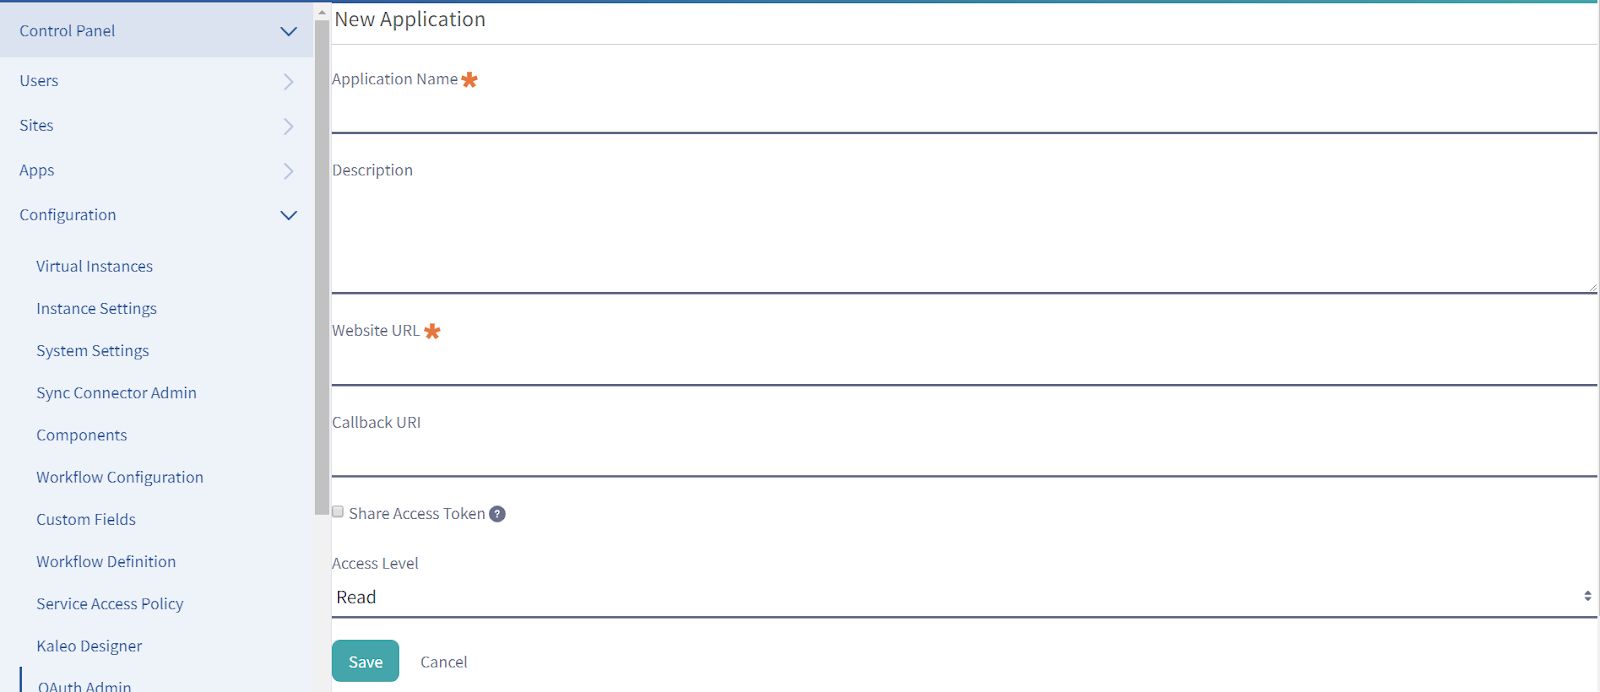
Fig 2.2: OAuth Admin create app screen
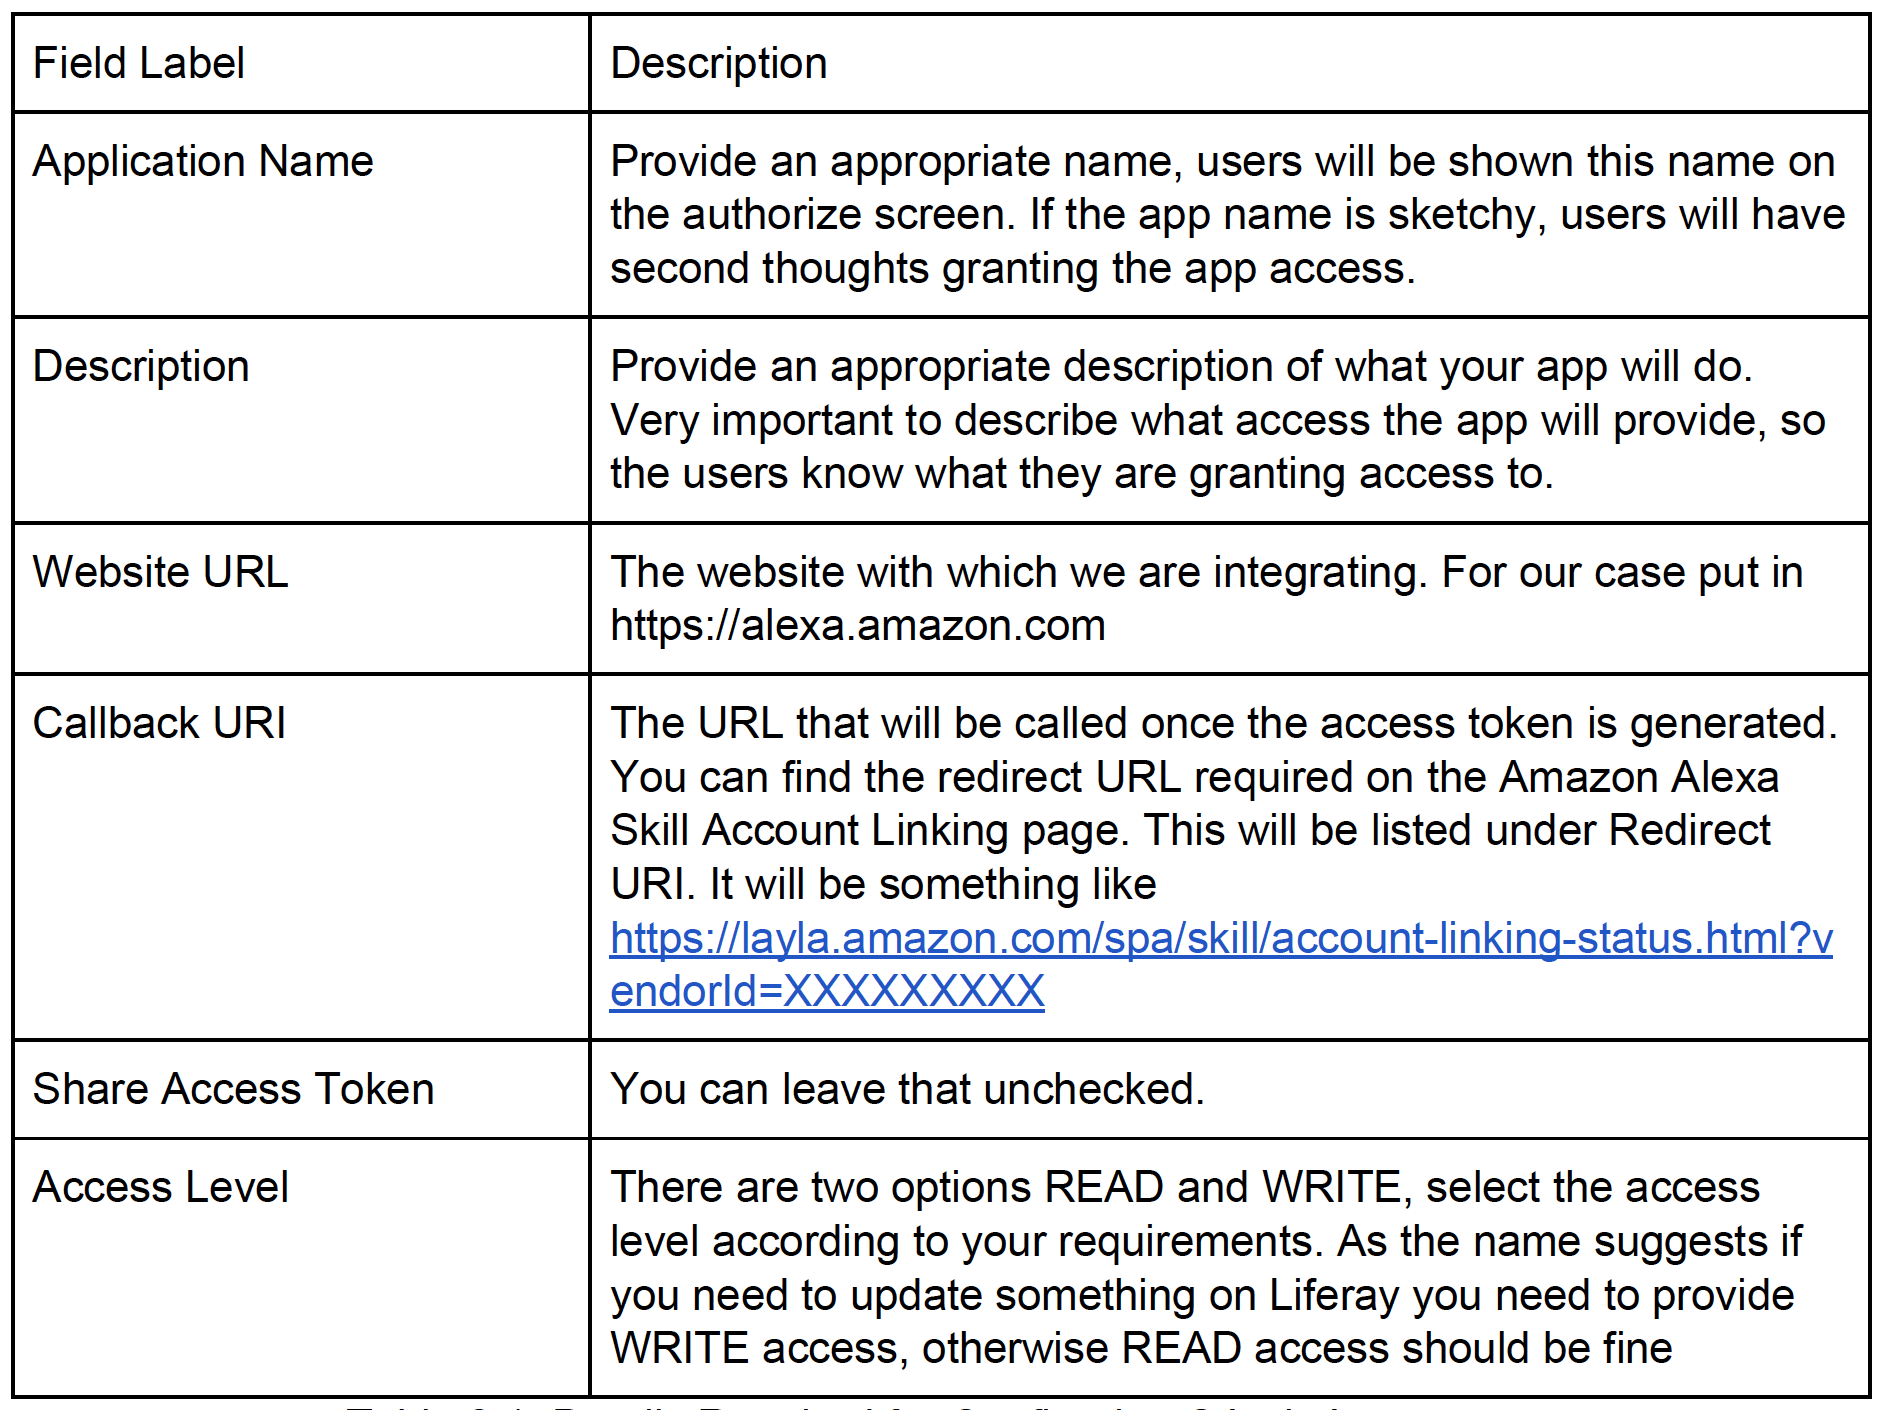
Table 2.1: Details Required for Configuring OAuth App
Click on save, your first OAuth app is ready. Now open the app that you have just created. You will see
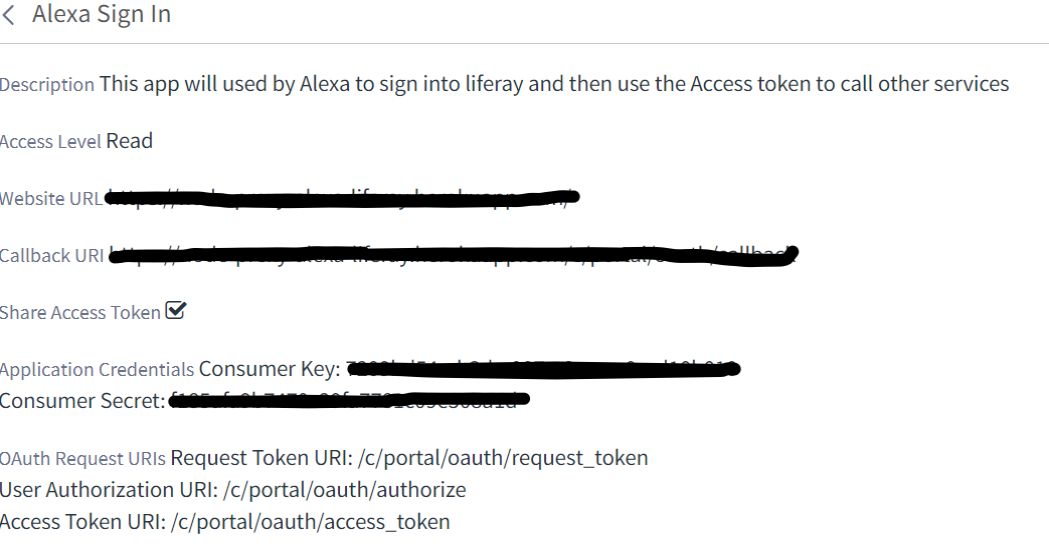
Fig 2.3: Liferay OAuth App Details
You can see the Application Credentials has been created. The Consumer Key and Consumer Secret are very important for making the account link, so keep them safe. It also lists the different URLs required for generating the Refresh Token, Authorization on the app and also the Token Generation URL.
You might have noticed that we said Alexa supports OAuth 2.0 to make the account linking, but Liferay DXP 7.0 provides support for OAuth 1.0a. In order to bridge the gap, we will create middleware that will bridge the gap between OAuth 2.0 and OAuth 1.0a.
3. Setting Up the Middleware
In our case, I created a simple Node.js application and hosted it on Heroku, though you can leverage AWS Lambda and API Gateways to get this done also. This app sits in the middle between Alexa Skill and Liferay and intercepts the OAuth calls made. In this app, I created an endpoint that catches the request coming from Alexa with the URL pattern ‘/c/portal/oauth/request_token’, and then makes the request token call to Liferay to retrieve the OAuth token. Using the retrieved OAuth token, we then call the authorize URLfor Liferay OAuth. You can find the authorize URL on Fig 2.3.
When the authorization URL is called, Liferay will present the user with Authorize screen
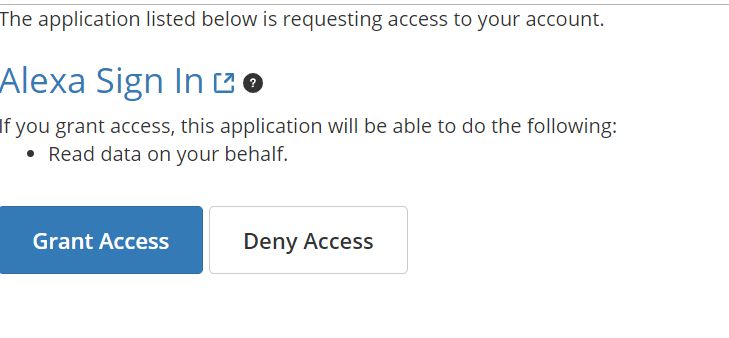
Fig 3.1: Liferay Authorize Screen
Once the user clicks on the Grant Access button, Liferay will call the callback URL that we have configured in your OAuth App in Liferay Control Panel. We will need to update the website URL and Callback URI we configured on Table 2.1. Change the website URL to your Heroku app URL and also update the Callback URI value to /c/portal/oauth/callback.
Now it is time to add another endpoint in our middleware app to handle /c/portal/oauth/callback. In the callback URL endpoint, we get the auth verifier from the request and make a call to the access token URL. If we get a successful response from the Liferay server we create a redirect URL with the required access tokens back to Alexa. When Alexa receives the access tokens it will display an account linking access message.
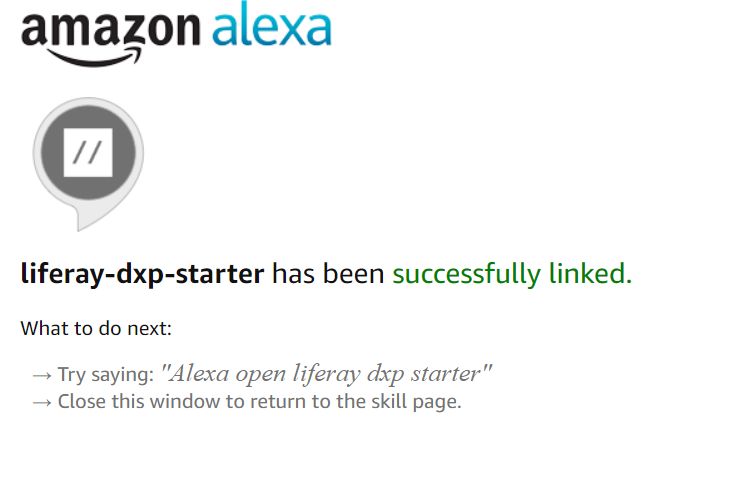
Fig 3.2: Account Linking Successful
Before you can see the delightful screen of successful account linking you will need to set up Alexa skill to talk to your middleware (in our case, Heroku) app.
4. Setting Up Alexa Skill
Prerequisite for this step, you have already created a custom skill. Once you have done that on your Amazon Developer Console, click on the Edit button beside your skill.

Fig 4.1: Amazon Developer Console
Click on the ACCOUNT LINKING link on the left-hand navigation. This will open the account link configuration screen.
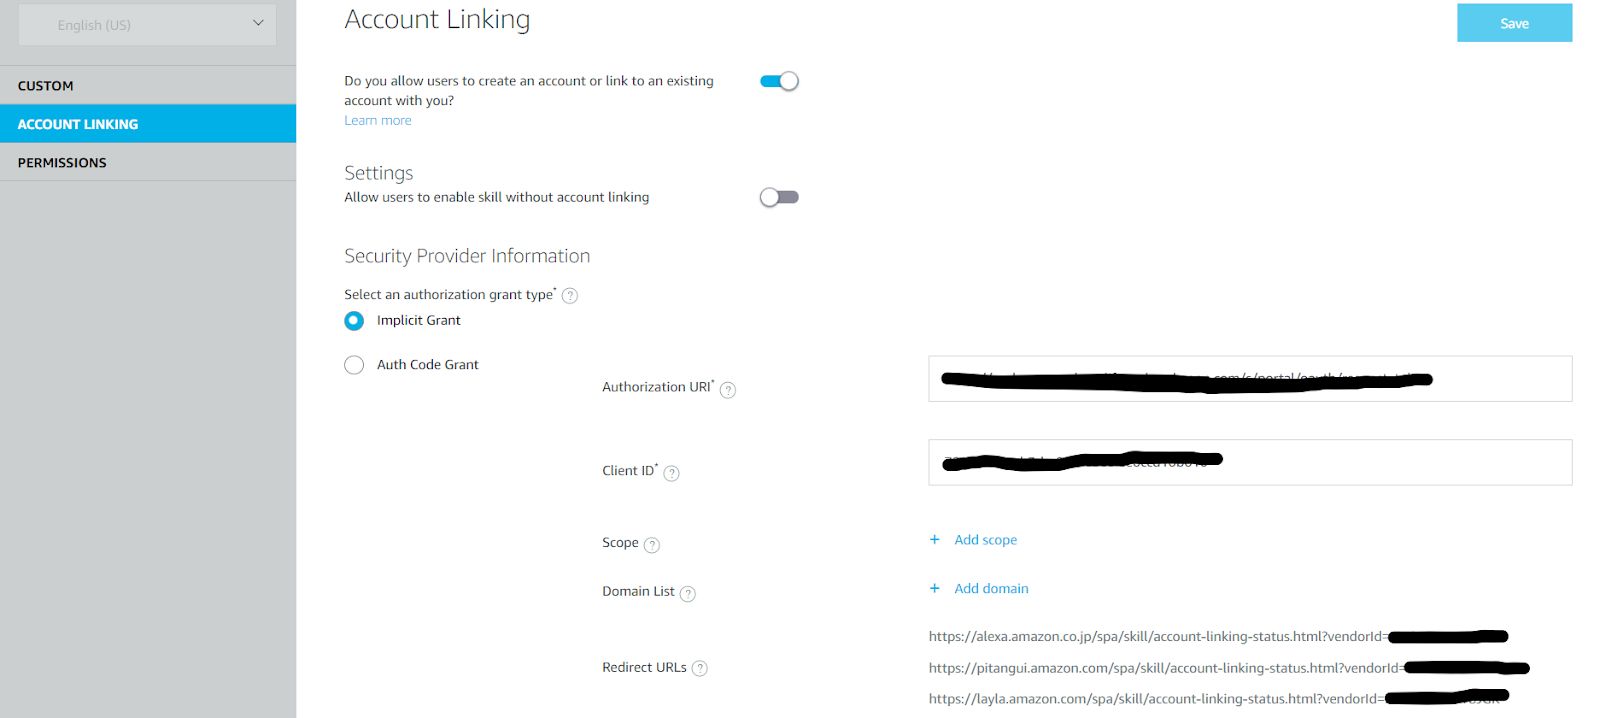
Fig 4.2: Account Linking Screen
Turn on the “Do you allow users to create an account or link to an existing account with you”. If you allow unauthorized access to some resources in your skill then you can turn on the “Allow users to enable the skill without account linking”, otherwise it will stay off.
In the Authorization Grant Type select Implicit Grant. For the Authorization URI provide /c/portal/oauth/request_token, which is one of the 2 endpoints we created in our middleware app. Provide the Consumer Key from the Liferay OAuth App that we copied. Click on Save, we have configured our Alexa Skill to do Account Linking with our Liferay Server.
5. Testing Account Linking
Go to Alexa on your browser or the Alexa App on your mobile phone. You should be able to find your skill under Your Skills.
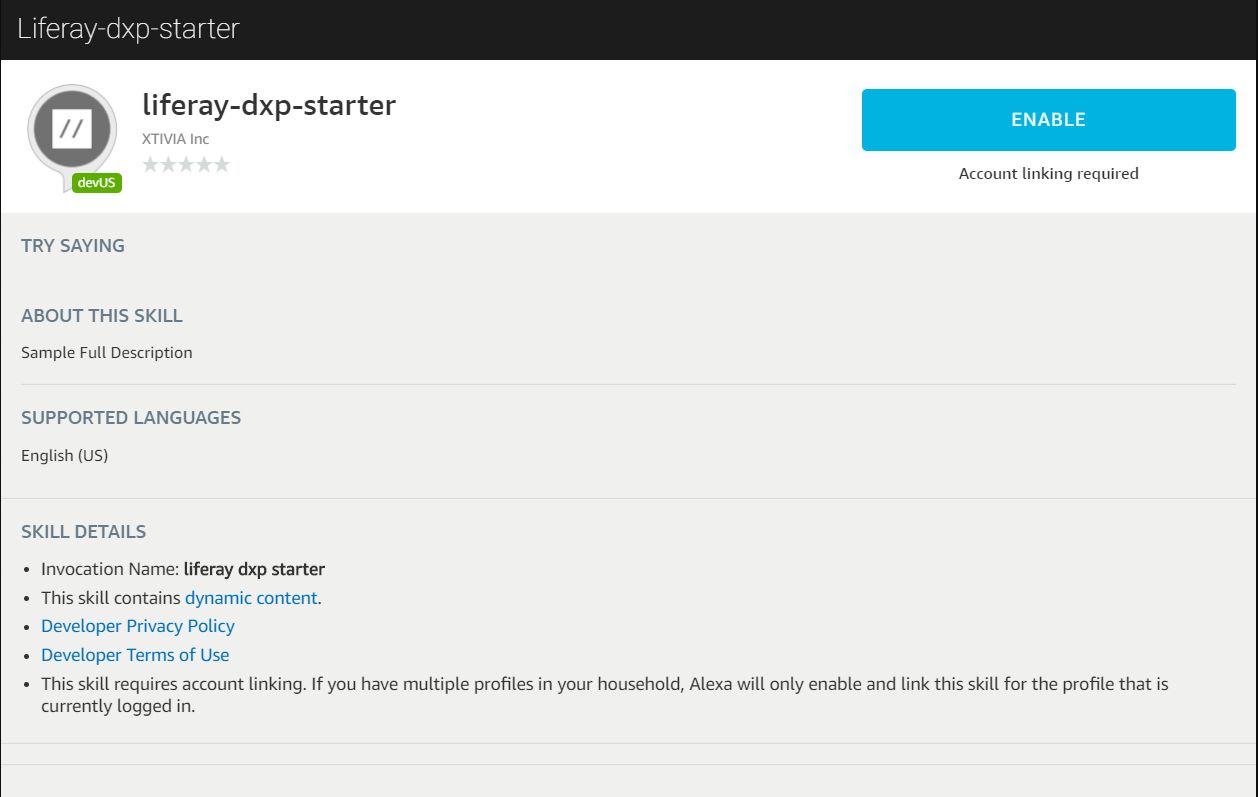
Fig 5.1: Your Skill
Once you click on the ENABLE link, you should be redirected to the Liferay login page, via the Heroku app. Enter the user credentials, the user will be redirected to the OAuth App authorization screen as shown in Fig 3.1. Once you Grant access, it will redirect you to the Alexa page as shown in Fig 3.2. You have successfully linked your Alexa Skill to your Liferay Account.
6. Testing Access Token in Alexa Skill
Once you have successfully linked your skill to the Liferay account, Alexa will make the access tokens available to you in the request envelope. You can see them if you are testing the skill on developer.amazon.com.
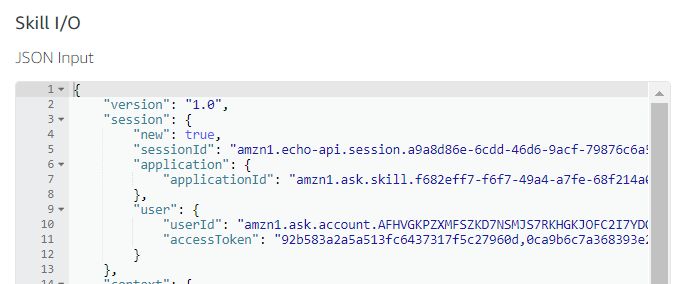
Fig 6.1: Access Token in Request Envelope
As you can see in the above figure, both access token and access token secret are available to the skill. Now let’s try to call the /api/jsonws/user/get-current-user with the access token and the access token secret we have in the request envelope.
Here’s a sample code for doing the same, we will again use OAuth node library for making the call
function ServiceHelper(accessToken) {
   this.accessTokenArray = accessToken.split(',');
   this.accessToken = this.accessTokenArray[0];
   this.accessTokenSecret = this.accessTokenArray[1];
   this.oa = new OAuth(
       constants.OAUTH_REQUEST_TOKEN_URL,
       constants.OAUTH_ACCESS_TOKEN_URL,
       constants.CLIENT_ID,
       constants.CLIENT_SECRET,
       '1.0',
       constants.OAUTH_CALLBACK_URL,
       'HMAC-SHA1'
   );
}
Fig 6.2: Initialize OAuth Object
ServiceHelper.prototype.getCurrentUser = function(){
   return new Promise(
       (resolve, reject) => {this.oa.get(constants.GET_CURRENT_USER_SERVICE,
            this.accessToken, this.accessTokenSecret,
       function(error, data, response) {
           if (error) {
                 reject("Error Fetching userDetails");
           } else {
               var parsedData = JSON.parse(data);
               let userDetails = {};
               userDetails.emailAddress = parsedData.emailAddress;
               userDetails.userId = parsedData.userId;
               resolve(userDetails);
           }
       });
   }).then(userDetails => {
       return userDetails;
   }).catch((error) => {
       return "Error Fetching userDetails";
   });
};
Fig 6.3: Fetching Current User
If you print out the userDetails object, you will see Liferay has returned the details about the user with whom you have linked your Alexa skill. You can call other JSONservices on Liferay also with the above access token and access token secret that you have. To determine what are the services you can call, check out Service Access Policy in Liferay Control Panel under Configurations.
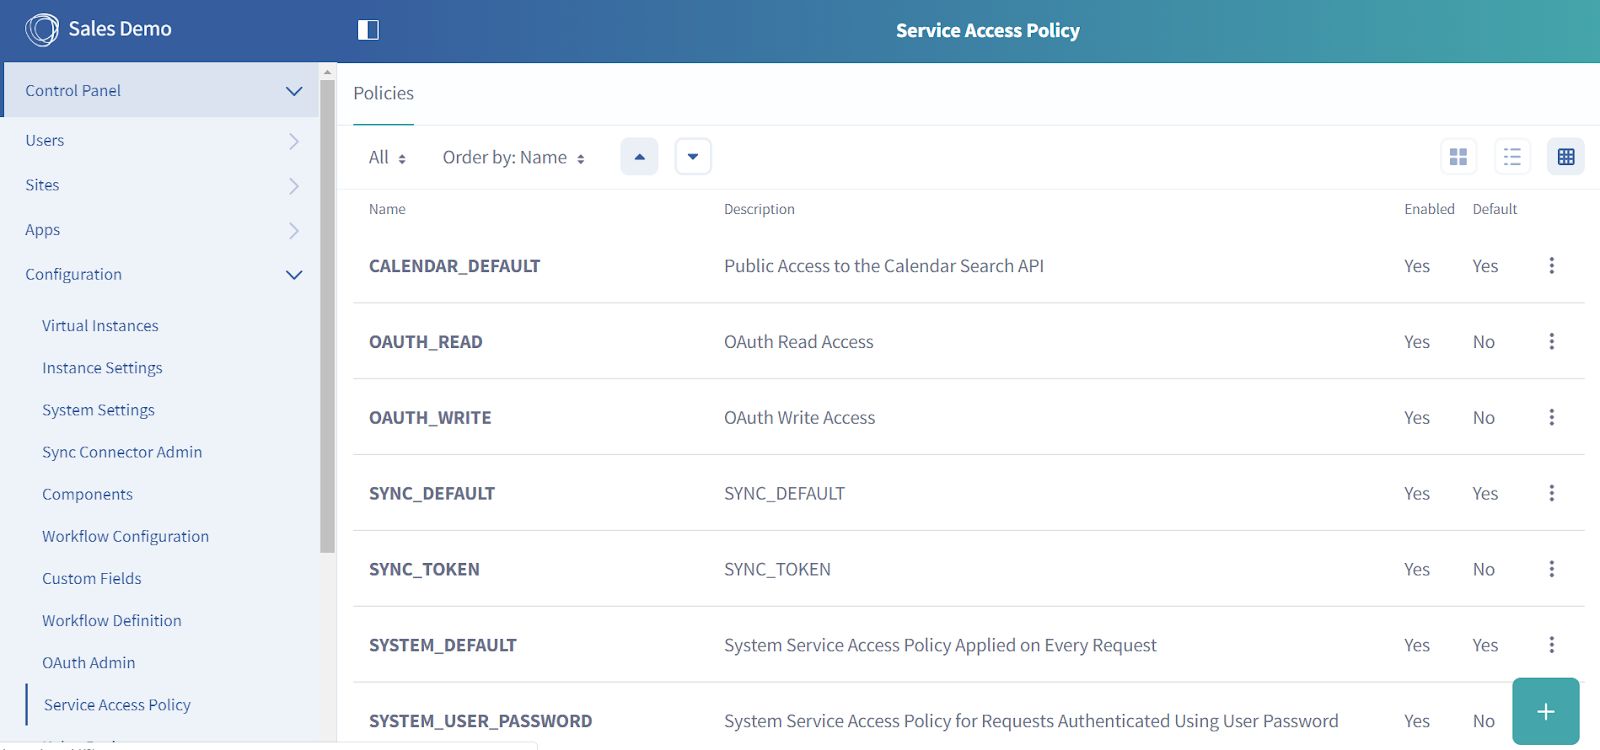
Fig 6.4: Service Access Policy
If you have generated a READ access, access Token then you should be able to call all endpoints mentioned under OAUTH_READ. You can modify the access policy and add and remove JSON services according to your requirements.
7. OAuth 1.0a Account Linking Flow
Since we have a working sample of the account linking flow, lets update Fig 1.0 with our changes.

Fig 7.0: Account Linking Flow with OAuth 1.0a
8. Summary
By achieving this account link with Liferay, you will be able to leverage your already existing services on Liferay platform to create even more engaging skills, that will provide a convenient and efficient way for end users to interact with your offerings.
Alexa and other virtual assistants on the markets have opened up an entire new paradigm where the triggers and events are voice rather than button clicks and taps on your smartphone screen.
If you have questions or need help with your Liferay DXP implementation, or with developing/integrating Alexa skills, please engage with us via comments on this blog post, or reach out to us.

