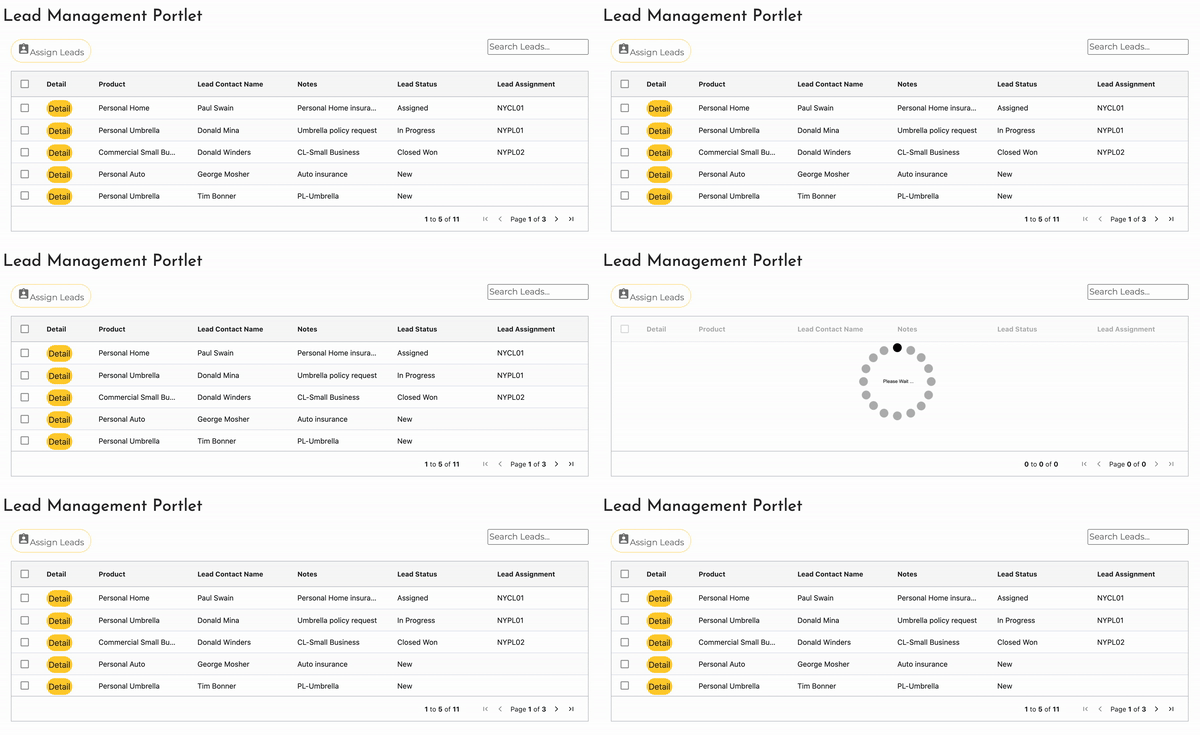
Recently I was tasked with developing a custom Angular widget on the latest release of Liferay DXP 7.3. This widget was developed to act as a reference architecture of an Angular SPA running in a Liferay portal environment.
The specific widget I developed was a Lead Management widget, a basic CRUD application that communicates via RESTful services to an external back-end system for managing sales leads. The reference architecture allows the back-end REST services to be easily mocked or simulated via tools like Strapi. We used a Strapi server to implement a lightweight, simple Leads management REST API to develop our widget against.
Liferay JavaScript Widgets
To build a Liferay widget with modern front-end development tools, a simple approach is to use Liferay’s JavaScript toolkit and liferay-npm-bundler. In its basic form, a bundler is a software that bundles your application code along with its resources into a minimized, zipped bundle that can be easily deployed to the server. The liferay-npm-bundler is a bundler like Webpack or Browserify that targets Liferay as a platform. It bundles application resources and npm dependencies into a Liferay OSGi bundle ready for deployment to Liferay.
The JavaScript toolkit generates JavaScript widgets using pure JavaScript tooling. With this toolkit, you do not need to have a deep understanding of Java or Java-building environments/tools to write a JavaScript widget for Liferay. The toolkit is a Yeoman generator, which generates projects based on the selected toolchain, where npm and liferay-npm-bundler are used to manage the project configuration and build process.
Our Lead Management widget was initially created following the Developing Angular Applications guide from Liferay.
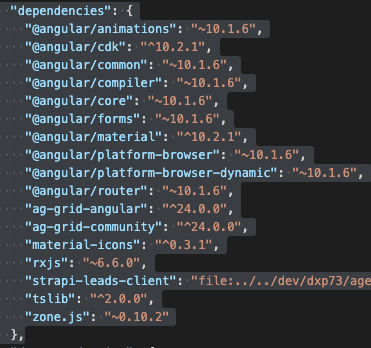
With an update to Angular 10.1.x and some other added libs, our Angular widget project had a final package.json file with the following dependencies:

If we build our application with the default liferay-npm-bundler config scripts, all of our dependencies are added to the final bundle file. When an oversized bundle is deployed to Liferay, we immediately experience some noticeable performance issues. The default build scripts for the liferay-npm-bundler are:

The first noticeable performance issue was the blank white screen displayed for an extended period while the widget initially loads the application. The overall widget load time was unacceptable.

The final bundled application created with the liferay-npm-bundler was extremely large, with a file size of around 281 MB. Wow!

We needed a quick solution to solve this performance problem for our customer pilot project. Based on the file size, it appears that the default configuration of liferay-npm-bundler does not perform any type of Front End Optimizations (FEO) such as production builds, tree shaking, minimization, etc. It performs a custom Liferay packaging, and that’s it.
Front End Optimization
There are several techniques to help achieve FEO. Code splitting is one such technique that improves performance by partitioning the application into chunks, then serving those chunks to the application routes that need them. This technique works to a point, but it doesn’t address another common problem of JavaScript-heavy applications: the inclusion of unused code or “dead code.” To solve this problem, developers rely on tree shaking.
Tree shaking is a form of dead code elimination. It comes from the mental model of your application and its dependencies as tree-like structures. Each node in the tree represents a dependency that provides distinct functionality for your app. In modern apps, these dependencies are brought in via the static structure of ES2015 module syntax’s static structure, i.e., import and export. The name Tree Shaking and related concepts have been popularized by the ES2015 module bundler Rollup and are also included in Webpack.
Angular CLI
Angular CLI is a command-line interface tool for initializing, developing, scaffolding, and maintaining Angular applications directly from a command shell. It is a very powerful tool that goes way beyond the simple bundler or generator.
- It has Webpack under the hood, already pre-configured, so you enjoy the benefits without the hassle of configuration.
- It’s very easy to use with a set of CLI commands.
- It comes with a code generator – you can use it to create skeletons of the most common ones (Components, Directives, Services, and Pipes) by simply using the CLI command ng g <type>.
Additional benefits of the Angular CLI tool include application environments and production-optimized builds. If we build our Lead Management widget as a native Angular CLI project, we can benefit from these built-in FEO features of Angular. So, we refactored the Lead Management widget project as described in this tutorial.
Now that we have a production-ready FEO build, created with the Angular CLI (Webpack), we can adapt it to work with Liferay. The Liferay JavaScript toolkit offers an adapt feature that allows the adaption of mainstream framework projects to the Liferay JS Toolkit. This lets you create JS projects with your favorite tool and deploy it to Liferay without any need to tweak anything. The adapter will run the production build of your project’s native framework under the hood, and when it’s finished, take the result of that build and convert it into a deployable Liferay OSGi bundle.
The final bundled application created with the Lead Management project’s adapted version was much smaller, around 2 MB in size.

This made a huge difference! The reduced file size of the Angular CLI production build alleviated the performance problems we experienced when using just the liferay-npm-bundler alone.
Summary
Application performance is a crucial element of your architecture. FEO helps fine-tune your website to make it more browser-friendly and load quicker. Broadly speaking, FEO focuses on reducing file sizes and minimizing the number of requests needed for a given page to load.
Utilizing the native Angular CLI and the liferay-npm-bundler allowed us to take advantage of the FEO build that the native Angular tool produces. Liferay-npm-bundler can then take this optimized bundle and adapt it at build time to be deployable to Liferay, greatly improving the widget’s overall performance in the portal.
If you have questions on how you can best leverage Angular with Liferay DXP or want to know how to configure FEO builds in liferay-npm-bundler, or just need help with your Liferay DXP implementation, please engage with us via comments on this blog post, or reach out to us at here.

